lunedì 26 dicembre 2011

Il regalo di Natale più bello...My best Christmas present.....


Io e PaulBoIMG_3204_2


Io, Paul, Manu e Pat...

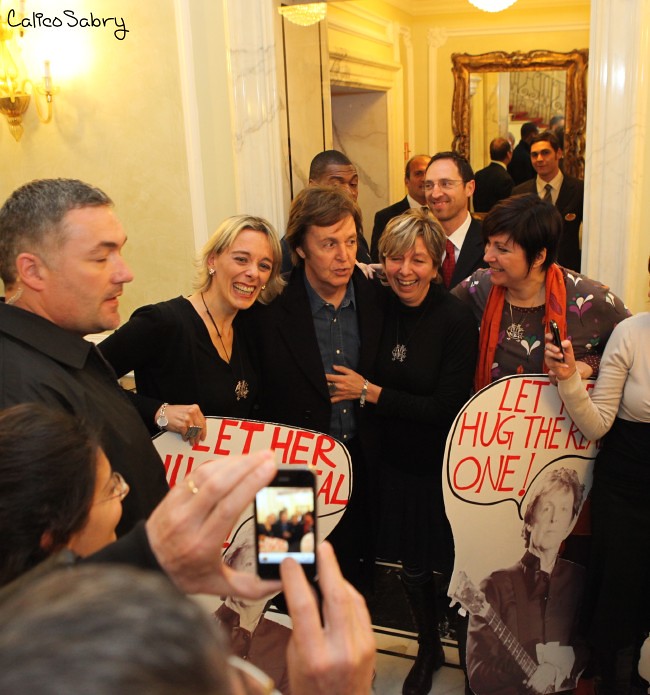
Quanto tempo ci vuole per realizzare un sogno? O meglio, volevo dire...quanto ci ho messo per realizzare il mio sogno? Circa 35 anni, oggi ne ho 44 e durante tutti questi anni, a cominciare da quando ne avevo dieci, non ho mai smesso di sognare di avere una foto in cui Paul fosse accanto a me. Ecco l'incontro: 34 secondi di felicità...
Eppure l'idea mi e' sempre sembrata così irreale, forse perchè non sono ottimista e quindi ora che la foto esiste sia io che le mie amiche fatichiamo a credere che sia accaduto l'impossibile e vogliamo convincerci che quello che appare nella foto accanto a noi sia lo stesso che vedete qui:


e qui

e anche questo e' sempre lui!!!
Paul live BoP1010412

Bologna, un segno del destino
Eravamo stati a Bologna nel 2000 per il concerto di Santana e non avevamo un bel ricordo di quel weekend, non della citta' perchè non l'avevamo visitata ma piuttosto del concerto, visto troppo da lontano e soprattutto dell'hotel, ancora non so come abbia fatto mio marito a trovare un posto del genere. Cose che capitano...ovunque ovviamente, ci tengo a precisarlo. La città mi è piaciuta tanto, i bolognesi ancora di più anzi ne approfitto per salutare gli amici di Bologna.
Poi, tornando per un momento alla cucina, quella sera abbiamo assaggiato un risotto alla zucca con fave di cacao veramente strepitoso, preparato da un giovane chef molto bravo: il modo migliore per concludere una giornata indimenticabile :))

Non era un hotel ma un posto fatiscente e sporchissimo. L'impatto e' stato terribile e allora ero troppo giovane e tollerante per decidere di fuggire da quel luogo squallido, in più non volevo offendere Gianni che aveva organizzato tutto.
Insomma, abbiamo lasciato le nostre cose li e siamo andati al concerto.
Il rientro e' stato terribile anche se oggi mi viene da ridere.
Era notte fonda e avevo anche paura di fare brutti incontri in ascensore così abbiamo deciso di usare le scale....dopo pochi gradini ci siamo bloccati...lì di fronte a me, sulla moquette marrone logora c'era uno scarafaggio...non riuscivo a muovermi, ero terrorizzata e disgustata...poi, dopo aver superato l'ostacolo con un salto, ricordo di aver pensato a quanto fossi poco consapevole ogni volta che parlavo "dei miei amati scarafaggi".

A 11 anni di distanza mi sono ritrovata di nuovo a Bologna e per uno scherzo del destino anche questa volta proprio sulle scale di un hotel, ovviamente splendido e più pulito che mai, ho visto apparire all'improvviso "il mio amato scarafaggio di Liverpool"...
Ci devo credere ai segni del destino??? :))))

Sir Paul e' stato così gentile da dedicare qualche parola ai nostri posters anche durante il concerto, di fronte ad appena 13000 persone. Quando ci ha visto sollevarli in alto tra la folla ha detto: " Quelle persone laggiù, che hanno chiesto...Posso abbracciare quello vero?....Vi ho già abbracciato ieri sera!!! Ma non e' quello che pensate voi! ( rivolgendosi al pubblico e ridendo ;)... E' successo in hotel...."
Ecco il link: 1.06 min
Insomma, lo abbiamo incontrato davvero e lui ha confermato tutto, nel caso qualcuno non ci avesse creduto!!

Questo e' stato il mio regalo di Natale più bello, una foto con Paul...in una cornice, nella mia stanza, nella mia vita....

Thank you Paul,
Love Sabrina


Pat, Io, Manu e Marta che ha fatto il video in hotel, grazie Marta! Sei stata una splendida compagna di viaggio!

For Liverpuddlians and English speaking people everywhere …

Io e Paul Bo2IMG_3206_2

Me, Paul, Manu and Pat...

How long does it take to make a dream come true? To put it better...how long did it take me to make my dream come true? About 35 years, today I am 44 and over all these years, starting from when I was ten, I have never stopped dreaming of having a picture taken with Paul next to me. 34 seconds of happiness...
Yet, the idea always seemed so unreal, a dream infact. Maybe because I'm not an optimistic kind of person so now that the picture exists me and my two friends strive to believe that the unbelievable happened and are trying hard to convince ourselves that the man who took a picture with us is the same we can se here:
and here....

and even this one is always him!!!
Paul live BoP1010412

Bologna, a sign of destiny
My husband and I had been in Bologna in 2000 for the concert of Santana and we didn't have nice memories of that weekend, not especially of the town which we didn't visit but rather of the concert, where we were too far back to see and even more of the hotel, I still can't understand how my husband managed to find such a place...
It could have happened anywhere in the world of course. I loved the town and even more the people, actually I have lots of friends in Bologna :))
Talking about food we had the most delicious pumpkin risotto in the world that night, prepared by a fantastic young chef!

It was not an hotel, it was a disgusting seedy and dirty building. The impact was awful and I was too naive and tolerant then to decide to run away from that shabby place, furthermore I didn't want to offend Gianni who had organized the trip.
So, we left our things there and went straight to the concert.
Our return was terrible even if today the thing makes me laugh.

It was the dead of the night and I was afraid of having nasty experience in the elevator so we decided to use the stairs...after a few steps we froze...there in front of me, over the brown worn-out stairs carpet was a cockroach .... I couldn't move, I was terrified and disgusted...then, after jumping over the obstacle, I remember of thinking how unaware of reality I must have been whenever I spoke about "my beloved beetles".
To be clear, I have to explain to you that in Italy for some reason, since the 60s we have always called the Beatles the cockroaches, which, as my English teacher said, are different from beetles, so now you'll probably understand better what I meant.


Eleven years later I found myself again in Bologna and in a twist of fate even this time, just over the stairs of an hotel, of course this time a luxurious and pristine one, out of the blue I saw " my beloved Beatle/beetle from Liverpool" climbing up and appearing within my sight....
Do I have to believe in signs of destiny???? :)))

Sir Paul was so kind as to mention our signs, in front of "only" 13.000 people during the concert, when we hold them up again. He explained to the audience: " those people over there...asking "can I hug the real one?....I hugged you last night!!!! But it's not what you think!!!" ( to the audience again, laughing) "It was at the hotel...."!!!
So, in the end, we really met him and he confirmed everything, in case somebody didn't believe us!!!!
Here's the link: 1.06 min..

This was my most beautiful Christmas present, my picture with Paul... in a beautiful frame, in my room in my house in my life...

Thank you Paul,
Love Sabrina


domenica 4 dicembre 2011

Sugar cookies, Cupcakes e Royal Icing

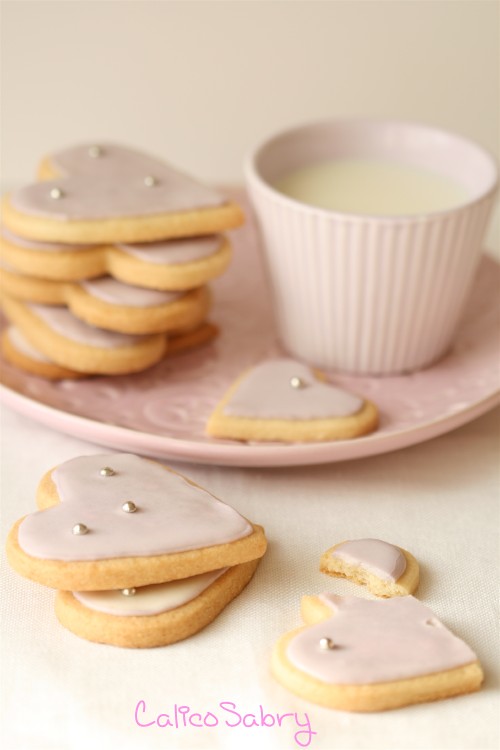
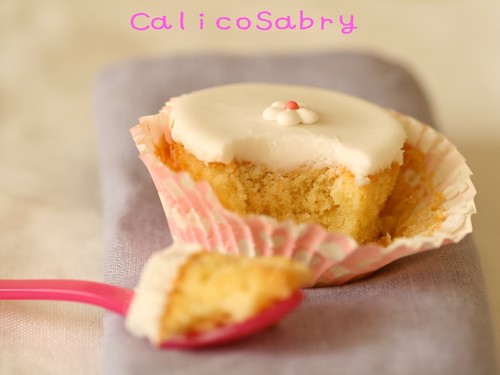
SugarcookiesIMG_4349


Quante volte vi capita di voler sostituire un ingrediente con un altro? Tante, ne sono certa! Avete notato anche voi che ogni volta che si parla di una ricetta inevitabilmente si cerca la sostituzione? Come se la versatilita' fosse un requisito irrinunciabile. Personalmente non sono sempre d'accordo, in genere preferisco seguire la ricetta originale e se non ho tutti gli ingredienti rimando.

Oggi, giusto per spirito di contraddizione, voglio parlare proprio della sostituzione di un ingrediente, in una ricetta che ho provato e che mi sembra una soluzione geniale.

Ho preparato questo post pensando alle amiche a cui piacciono i biscotti con la glassa e a Francesca, che mi ha rimproverato perchè secondo lei nelle mie ricette uso spesso ingredienti assurdi tanto che mi ha detto: " Ma dove li vado a trovare!" Sono sicura che a proposito della meringue powder mi direbbe la stessa cosa...Allora Francesca, ecco come risolvere il problema!


Dunque, comincerei dalla fine, cioe' dalla Royal Icing che ho usato sia per decorare i biscotti che i cupcakes. Gli ingredienti della Royal Icing sono tre: l'albume, l'acqua e lo zucchero. Visto che non tutti usano l'uovo crudo, inclusa me, in alternativa (prima sostituzione) c'e' la Meringue Powder che qui non si trova facilmente ma noi, ecco il motivo del post di oggi, possiamo visitare il blog Dalle mie manine di Cindy, coinquilina di Coquinaria e quello di Fragola e Limone e vedere come sostituire la Meringue Powder. Complimenti ragazze!


Camera Roll-49

Questa è la ricetta di Cindy per la glassa:

Royal Icing

30 gr di polvere di meringa
80/100 ml di acqua calda
440 gr di zucchero a velo

Ho polverizzato la meringa e l'ho mescolata con lo zucchero. Ho versato tutto nella planetaria, ho aggiunto l'acqua ed ho mescolato per qualche minuto. La glassa mi è venuta un pò liquida; ho messo 100 ml di acqua la prossima volta ne metterò 80; anche se la quantità in più è minima la differenza in una glassa si nota.
Inizialmente ho avuto bisogno di un impasto più denso per tracciare il bordo del biscotto che ho lasciato asciugare per mezz'ora circa. Cindy spiega anche come realizzare i conetti di carta. Dopodichè si può diluire la glassa con pochissima acqua e decorare la parte interna, se volete potete usare un cucchiaino come ho fatto io.
Infine, ho usato i coloranti in gel o in polvere, ne basta una quantità minima contrariamente a quelli liquidi che per questo motivo sono meno adatti, renderebbero la glassa troppo liquida.

Francesca, come vedi puoi sostituire la Meringue Powder con la meringa. Le meringhe le abbiamo mangiate proprio il giorno in cui sei venuta a cena, ti ricordi? Comunque se non vuoi prepararle le puoi comprare :))

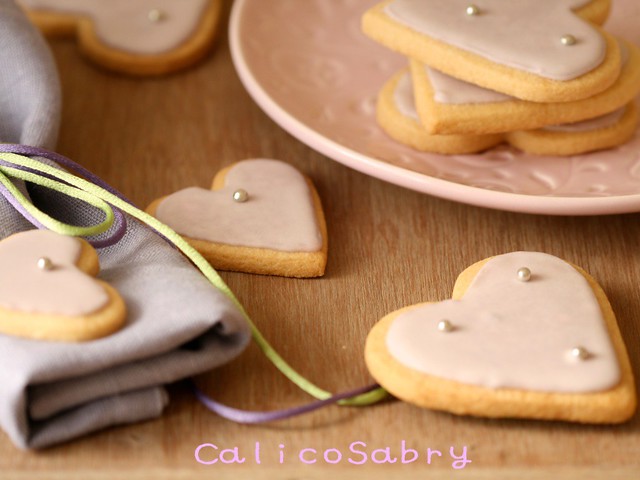
Per gli Sugar Cookies ho seguito la ricetta di Rosie nel suo bellissimo sito che si chiama Sweetapolita e devo dire questi biscotti sono buoni da impazzire, non potevo sperare in qualcosa di meglio. Per ottenere uno spessore uniforme ho seguito il suo consiglio ma al posto dei bastoncini cilindrici ho usato due matite; sono un pò corte ma la forma è più comoda perchè non rotolano via!

Sugar Cookies

750 gr farina
1 cucchiaino di sale
1 cucchiaino di lievito
450 gr di burro morbido
400 gr di zucchero
2 uova
2 cucchiaini di estratto di vaniglia
1/4 di cucchiaino di estratto di limone

Per questa volta ho preparato meta' dose e poi non ho messo l'estratto di limone e sicuramente quando li rifarò metterò la scorza di limone.
In una ciotola mescolare la farina, il sale e il lievito. Nella planetaria amalgamare il burro con lo zucchero e aggiungere le uova. Unire la farina con il sale e il lievito e mescolare a bassa velocità. Alla fine aggiungere la vaniglia.

A questo punto l'impasto sarà molto cremoso e impossibile da lavorare, quindi si mette in frigo per circa mezz'ora o fino a quando non raggiungerà la consistenza sufficiente per poterlo stendere, usando due fogli di carta da forno e (come vi ho già detto) due matite per ottenere uno spessore uniforme.
Dopodiché si mette di nuovo la pasta in frigo oppure se e' abbastanza compatta si possono già formare i biscotti con gli stampini.
Infine i biscotti si mettono in freezer per farli solidificare prima di cuocerli per 15 minuti oppure per conservarli e prepararli in un altro momento.
Cuocere a 160 C per 10-12 min oppure fino a quando siano dorati.

Cupcakes


Camera Roll-51

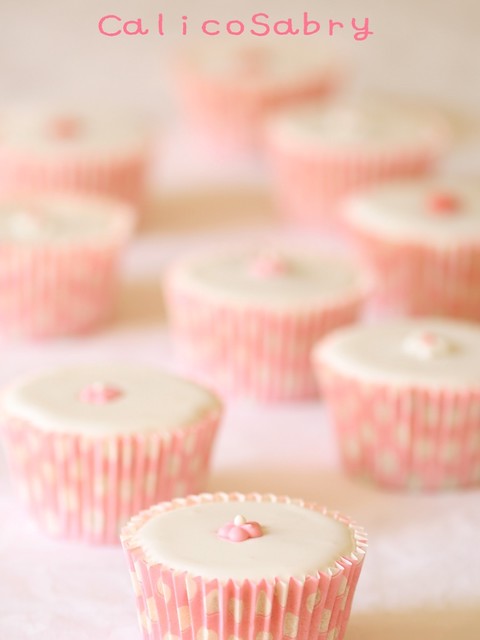
La ricetta dei cupcakes e' di Nigella, volevo come al solito una ricetta veloce e questa, quanto a velocità e semplicità e' imbattibile. Sinceramente quando ho visto la foto sul sito ho pensato che comunque avrei potuto togliere la glassa prima di mangiarli, convinta che fossero troppo dolci, invece alla fine, come vedete ho mangiato anche quella, sono divini! Provateli!
In questo caso per la Royal Icing ho usato la Meringue Powder della Wilton. Ho deciso di comprarla per esercitarmi un po' nella decorazione senza dover preparare anche le meringhe. In effetti il primo esperimento con i biscotti e' stato impegnativo, all'inizio ho usato dei beccucci di silicone ma la glassa si asciugava subito e ho faticato tantissimo, alla fine ho provato i conetti di carta da forno che ha usato Cindy, ero un po' scettica invece la decorazione e' decisamente migliorata. La velocita' non molto perchè i coni mi si aprivano tra le mani quindi devo riprovare tutto con calma. Nel frattempo ho comprato sia i beccucci della Wilton che i coni usa e getta; per quanto riguarda gli ingredienti non ho notato una differenza nelle due glasse, per questo l'idea della meringa, dopo aver fatto il confronto, mi ha definitivamente convinto.

Ingredienti

125 gr farina auto lievitante
125gr zucchero
125gr burro a temperatura ambiente
2 uova
1/2 cucchiaino di estratto di vaniglia
2 cucchiai di latte

Nigella dice che preparare i cupcakes non potrebbe essere piu' semplice, e' sufficiente mescolare tutti gli ingredienti, tranne il latte, nella planetaria.
Oppure in una ciotola, amalgamare il burro con lo zucchero. Aggiungere le uova, una alla volta e un po' di farina. Unire la vaniglia e il resto della farina.
Alla fine si aggiungono circa 2 cucchiai di latte fino ad ottenere la consistenza giusta per versare l'impasto negli stampini.
La quantità di impasto, dice Nigella, sembra insufficiente per riempire 12 stampini e infatti e' esattamente quello che ho pensato anch'io, ma non e' così ve lo assicuro.
Dunque, ho diviso l'impasto in 12 stampini di carta e poi li ho messi in quelli di alluminio. Il sito di Nigella suggerisce di cuocere i cupcakes a 200 C, io li ho cotti per 20 minuti nel forno statico a 160 C.


Camera Roll-54

Camera Roll-53

Per la Royal Icing ho seguito di nuovo la ricetta di Rosie, che è simile a quella di Cindy nel senso che la quantita di zucchero è la stessa ma al posto della meringa polverizzata ho usato la Meringue powder della Wilton.

Ingredienti:

2 cucchiai di Meringue Powder Wilton
80/100 ml di acqua
440 gr di zucchero

Ho mescolato tutto nella Kitchen Aid e con un cucchiaino ho versato la glassa nei cupcakes.

Song of the day: Dance Tonight....

For Liverpuddlians and English speaking people everywhere …


How many times do you need to substitute an ingredient for another? A lot, I'm sure! Do you also notice that whenever you talk about a new recipe there is always somebody who asks how to substitute at least one of the ingredients? As if versatility was necessary if not essential. Personally I don't agree, I usually prefer following the original recipe and if I don't have all the ingredients I put off till I have everything I need.
Today, in the spirit of contrariness I'm going to talk just about the substitution of an ingredient. It's in a recipe that I've tried and that really seems a brilliant idea.
I made this post thinking to the friends who like cookies with the icing and to my friend Francesca, who told me off ;) because she says that I often use weird ingredients so she asked "Where in the world can I find them?" I' m sure that talking about meringue powder she would say just this...Well, Francesca, here is how to solve the problem!
Well, I want to start from the end, which is the Royal Icing I used to decorate the cookies the cookies and the cupcakes. The ingredients for the Royal Icing are three: egg white, water and sugar.
Considering that most people, including me don't use raw eggs, we can try the first substitution that is Meringue Powder which, however, you wouldn't easily find here in Italy. In this case you can visit Dalle mie manine a food blog by Cindy who is a friend from Coquinaria and the blog Fragole e limone where you can see how to substitute Meringue Powder. .....

Song of the day: Dance Tonight....

This is the recipe Cindy used for the Royal Icing:

30gr home made meringue powder
80/100 ml hot water
440 gr icing sugar

I made a batch of meringue just to decorate my cookies. I weighed 30 gr of meringue, I placed it in my blender and process until very fine. Then I mix sugar and meringue together and put it in the Ka. I added water and mixed for a few minutes. The icing came out a bit too liquidy; I put 100 ml of water so next time I'll put 80; even if it's only 20 ml more the difference in a royal icing is very apparent.
At the beginning I needed a thicker icing to pipe around the border of the cookies so I let some drying for 1/2 an hour. Cindy explains how to make paper cones.
Then I made a flood icing by adding some water, one teaspoon at a time and filled the bordered area of cookies with the same teaspoon.
Finally, I used gel and powder food coloring because a very small amount is sufficient to color the icing so they are more suitable than the liquid ones that would make the icing too runny.
Francesca, as you can see you can substitute Meringue powder with meringue. We ate the meringues I made just when you came over for dinner, do you remember? Anyway, if you don't feel like making them you can always buy some.
As for the sugar cookies I followed Rosie's recipe on her amazingly beautiful site called Sweetapolita and I have to say that they came out just great!
Instead of the dowels she suggested to get an even dough, I used two pencils and it worked well because with their hexagonal shape they didn't roll away!

The perfect sugar cookie

Yield: Approximately 30 medium/small mixed shape cookies
Ingredients:

6 cups (750 grams/1 lb + 10 ounces) sifted all-purpose flour
1 teaspoon (6 grams) salt
2 cups unsalted butter, (1 lb, 454 grams, 16 ounces) in cubes, softened for about 20 minutes at room temperature
2 cups (400 grams/14 ounces) sugar
2 large eggs (straight from refrigerator)
2 teaspoons (10 mL) pure vanilla extract
1/4 teaspoon (1.25 mL) pure lemon extract

1. In large bowl, sift together flour and salt. Set aside.
2. Use an electric mixer to cream butter and sugar until fluffy. Beat in eggs.
3. Add flour mixture and mix on low speed until thoroughly combined. Stir in vanilla and lemon extract.
4. Remove 1/2 of dough from bowl, make a ball, and place on a large piece of plastic wrap on counter.
5. Wrap the sides of wrap over the ball, then press down with the palm of your hand and make a disc about 2″ thick. Finish wrapping the disc with the plastic wrap. Repeat with 2nd half of dough.
6. Chill both discs of dough for about 45 minutes.
7. Remove one disc and remove plastic wrap. Place on top of a large piece of parchment paper (I use a silicone rolling mat underneath to ensure it doesn’t slip while rolling, but you can even dampen counter so the parchment sticks a bit.), then place two 1/4″ wooden dowels on either side of your dough, then another sheet of parchment paper.
8. Roll dough (this will require a bit of elbow grease for the first few minutes until it softens up a bit) so it’s flush with dowels–they will ensure that your dough is even thickness.
9. Preheat your oven to 350 F. Slide your parchment paper and dough onto a board, then place in refrigerator for about 15 minutes.
10. Remove from fridge, and cut your shapes using the cutters of your choice, placing them on a baker’s half sheet lined with a Silpat Mat, with 2″ clearance around each one and the edge of sheet.
11. Place sheet with cookies into freezer for 15 minutes before baking. Then bake 10-12 minutes, or until edges are golden brown.
12. Cool sheets on wire racks for 10 minutes, then gently remove cookies and place on wire racks to finish cooling.
May be stored at room temperature in an airtight container for up to 2 weeks. They also freeze well.

This time I only made half dose and didn't put lemon extract. Next time I will use lemon rind because here, in Italy I think it's very popular.
In a bowl, mix flour, salt and baking powder. In the Ka cream butter and sugar and add the eggs. Pour in the flour mixture, the vanilla and stir, on low speed, to combine.

Cupacakes

I have used Nigella's cupcake recipe, I needed, as always, a quick recipe and this one in terms of rapidity and easiness is just perfect. To tell you the truth, when I saw the picture on her site I thought I would avoid eating the icing, thinking they would be too sweet. But in the end I ate it all - both the cake AND the icing - as you can see in the picture, they are delicious! Try them some time!
In this case, for the Royal Icing I used the Wilton Meringue Powder. I decided to buy it because I wanted to practice decoration without the necessity of preparing the meringues first.
Actually, my first attempt at royal icing was complicated, I used the silicon nozzles at first but the icing dried out quickly so It took a lot of effort to finish them. Then I tried the paper cones like Cindy did, I was a bit skeptical but actually the decoration has definitely improved, the quickness of decorating not so much, however.
The cones opened up in my hands so I'll have to try again more carefully.
In the meantime I bought the Wilton nozzles and the disposable paper cones. As for the ingredients, I didn't notice a big difference between the two icings; this is why the idea of the homemade meringue powder, after making the comparison, convinced me in the end.
For the Royal Icing I followed Rosie's recipe again, which is similar to Cindy's one; it has the same quantity of sugar but I substituted the homemade meringue powder I put the Wilton's.

Ingredients

125g self-raising flour
125g caster sugar
125g soft unsalted butter
2 eggs
Half a teaspoon real vanilla extract
Approximately 2 tablespoons milk
Food colouring - for preference, colour pastes specialist cake decorations of choice e.g. wafer roses, sugar flowers, dolly mixtures, and sprinkles
1 x 12-bun muffin tin 12 muffin papers

Method
Serves: Makes 12
Preheat the oven to 200C and line the tin with the muffin cases.
It couldn't be simpler to make cup cakes: just put all the ingredients except for the milk in the processor and then blitz till smooth.
Pulse while adding milk, to make for a soft, dropping consistency, down the funnel. Or using a bowl and wooden spoon, cream the butter and sugar, beat in the eggs one at a time with a little of the flour.
Then add the vanilla extract and fold in the rest of the flour, adding the milk to get the dropping consistency as before.
I know it looks as if you'll never make this scant mixture fit 12 bun cases, but you will. I promise you this mixture is exactly right to make the 12 cup cakes, so just spoon and scrape the stuff in, trying to fill each case equally, judging by eye only of course.
Put in the oven and bake for 15-20 minutes or until the cup cakes are cooked and golden on top. As soon as bearable, take the cup cakes in their cases out of the tin and let cool, right way up, on a wire rack.
Once they're cool, make up a big, uncoloured batch of royal icing, and then remove a few spoonfuls at a time to small bowls.
Using a bamboo skewer, add small dots of colours from the paste-tubs, stirring with a teaspoon and then adding more colouring, very slowly, very cautiously (pastel works best here, whatever your everyday aesthetic) until you get the colour you want.
Use teaspoons to coat the cupcakes with icing and leave each a moment to dry only slightly, on the surface, before sticking on a rose, daisy or whole stash of decorations.

giovedì 27 ottobre 2011

Funghi ripieni di spinaci e noci

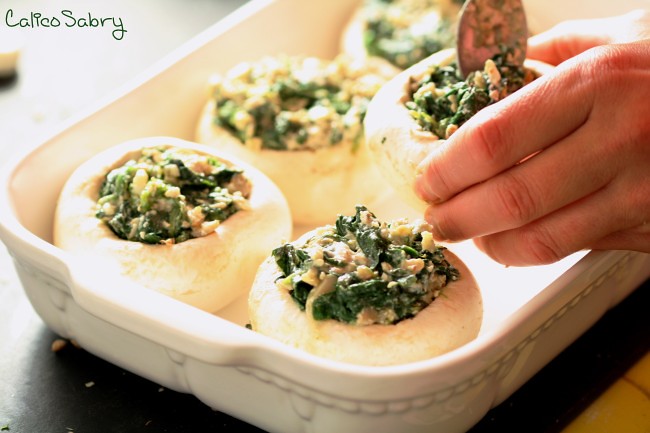
Funghi ripieni di spinaci e noci3938_2


Ho tante cose da fare in questo periodo, un mare di cose da fare: tanti libri da studiare, ricette da scegliere e da preparare, ospiti in arrivo, la palestra e gli amici. Ma va bene così, anzi benissimo purché io riesca a studiare.
Lo studio per me e' un viaggio, il mio viaggio preferito, che scoperta eh! Però è cosi', questa è la mia verità anche se poco originale. Ed è così reale questa idea del viaggio che negli ultimi anni non viaggio più, voglio dire fisicamente o meglio non faccio più viaggi in paesi lontani, sono diventata pigra. I libri mi attirano di più e visto che gli esami che devo ancora sostenere sono quasi tutti di storia, il mio è un viaggio nel passato che mi porta in luoghi remoti e tra popolazioni sconosciute, senza dover prenotare un posto scomodo su un volo low- cost con annesso mal di schiena e jet lag.
Ma vediamo, forse un giorno ci riproverò, devo trovare una buona motivazione per poter affrontare un lungo viaggio e al momento, concerti a parte, la motivazione più forte è sempre la cucina :)) Perchè sono così golosa?!!!

Song of the day: Off The Ground

Funghi ripieni di spinaci e noci da Waitrose

4 funghi grandi o 6 piccoli
150 gr di spinaci surgelati
olio d'oliva
2 spicchi di aglio
25 gr di noci tritate
2 cucchiai di yogurt
noce moscata
1 cucchiaio di pangrattato
2 cucchiai di parmigiano

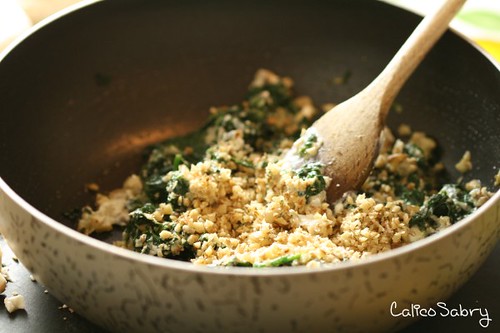
Ripieno dei funghi3927

Pulire i funghi, separarli dai gambi e metterli in una pirofila da forno con un cucchiaio di olio. Cuocere gli spinaci e scolarli.
In un tegame scaldare l'olio con l'aglio, unire i gambi dei funghi tritati e cuocerli per qualche minuto.
Aggiungere gli spinaci, le noci e lo yogurt. Condire con sale e noce moscata.
Riempire i funghi e cospargerli di pangrattato e parmigiano.
Cuocerli in forno a 200 per 12-15 minuti.

For Liverpuddlians and English speaking people everywhere …

I've got so many things to do during this time: lots of books to study, recipes to choose and to prepare, guests for dinner, the gym and my friends. But it's fine with me, as long as I can study.
Studying for me is a journey, my favourite one, what a revelation! But this is the truth even if I'm not original. Also, this idea of "travelling" is so real that I don't travel anymore, I mean phisically, in the sense that I don't travel to distant countries anymore, I have became lazy. I find books are more interesting and given that most of the exam I have to do are history exams, mine is a journey in the past that takes me to far away places and among strange people without sitting in an uncomfortable seat on a low-cost flight and consequently, getting a back ache or suffering from jet lag.
We'll see, one day I will travel again, I must find a good motivati in to take a long trip and, at the moment, apart from concerts, the strongest motivation, is food :)) why am I so glutton!

Song of the day: Off The Ground

Spinach and walnut-stuffed mushrooms

I found this recipe on the Waitrose website

4 large flat portabella mushrooms
150g frozen essential Waitrose Whole Leaf Spinach
1 tsp olive oil
2 cloves garlic, finely chopped
25g walnut pieces, chopped
2 tbsp essential Waitrose Soured Cream
¼ tsp grated nutmeg
1 tbsp white breadcrumbs
2 tbsp grated essential Waitrose Extra Mature Cheddar

1. Preheat the oven to 200ºC, gas mark 6. Remove the stalks from the mushrooms, placing the caps stalk-side-up in an oiled baking tin. Chop the stalks. Cook the spinach in a covered pan until defrosted then drain thoroughly.

2. Heat the oil in a non-stick frying pan and add the chopped mushroom stalks and garlic. Cook for 2 minutes until soft and golden. Stir in the spinach, walnuts and soured cream. Season and add the nutmeg. Spoon the mixture onto the mushrooms. Scatter the breadcrumbs and grated cheese over the mushrooms and bake for 12–15 minutes until cooked through and browned on top. Serve with a tomato and red onion salad and crusty bread.

martedì 4 ottobre 2011

Biscotti al pistacchi e cioccolato

chocolate and pistachio cookies4189_2


Titolo
Come gettare via 600 grammi di cioccolato fondente di buona qualita'

Ho un numero piuttosto elevato di amiche che ogni volta che supero un esame o preparo qualcosa da mangiare mi sommergono con un fiume di complimenti, alcune arrivano a dirmi: "Ma come fai?!!!!" come se fossero cose dell'altro mondo, che carine! Insomma, ho tante amiche che mi vogliono bene, non mi posso proprio lamentare, l'amicizia mi da tante soddisfazioni :))
Detto cio' vorrei parlarvi di sabato pomeriggio e dei dolcetti che ho preparato; ho studiato tutta l'estate e morivo dalla voglia di provare una ricetta nuova. Come al solito ne ho scelta una di Martha Stewart perche' lei e' una certezza ed e' affidabilissima....io molto meno.
A dire la verita' sono sempre divisa tra due passioni, lo studio e la cucina pertanto se trascuro il primo, salto gli esami, se trascuro la seconda, commetto errori grossolani che non dovrei propri raccontare, ma io non ci riesco :-D
La mattina ho comprato i 200gr di cioccolato fondente necessari per la glassa ma mio marito ha insistito e ne ha voluti prendere altri 400 grammi, dicendo che il cioccolato a casa non deve mancare mai.
La parte piu' impegnativa della ricetta, che in realta' e' molto semplice, era appena terminata quando ho cominciato a sciogliere il cioccolato....

A questo punto se qualche amica mi dovesse chiedere "ma come hai fatto", rispondero' che:
1) ho messo il cioccolato nel microonde, come ho visto fare ad un corso sul cioccolato e dopo qualche minuto ho buttato via una massa dura e informe
2) ho messo i secondi 200 gr a sciogliere a bagno maria e di nuovo ho buttato via la seconda massa
3) ho messo, incredula, per la terza volta altri 200 gr nel microonde: stessa massa!
4) chiamo Gianni sul cellulare quasi piangendo e gli chiedo di portare a casa altro cioccolato
Alla fine mi sono ricordata che quando cucinavo spesso, usavo un metodo generalmente sconsigliato che ha funzionato subito: il cioccolato nel pentolino con il burro. A fuoco bassissimo lo sciolgo tenendo il pentolino sospeso a circa 30 cm dalla fiamma. Finalmente e' andata bene :))

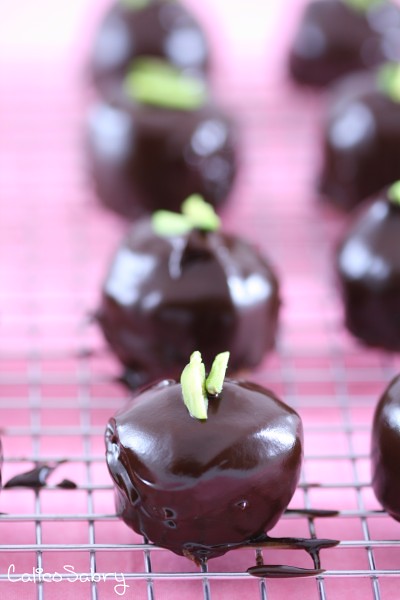
cioccolatini sulla griglia4131

Ecco come ho fatto! Dopo aver sciolto 800 gr di cioccolato ho finalmente riordinato la cucina ed ho preparato la macchina fotografica per fare le foto il giorno dopo.
E' vero che alcune cose mi riescono bene pero' fatico tanto :((
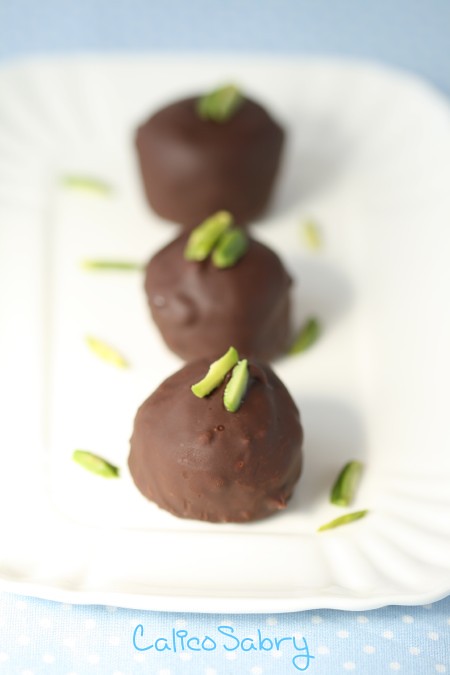
Per quanto riguarda la prima foto non mi sono sforzata molto, quella originale mi era piaciuta così tanto che ho cercato di imitarla, che ne pensate? E' all'altezza del modello?
La foto seguente invece è un pò diversa....

Cioccolatini di Martha4174

Ingredienti per 15 biscotti
110 gr zucchero
2 tuorli che ho sostituito con 2 cucchiai di panna
90 gr cioccolato fondente
120 gr di pistacchi macinati piu' qualche pistacchio per decorare
1 albume
estratto di vaniglia
un pizzico di sale
180 gr di cioccolato fondente
1 cucchiaio di burro

Per il ripieno: sciogliere il cioccolato con lo zucchero e 2 cucchiai di panna fresca, lasciare raffreddare. La versione originale con i tuorli la potete vedere nel link in alto.

Per i biscotti: lavorate i pistacchi con lo zucchero nella planetaria o con un cucchiaio di legno, aggiungere l'albume, la vaniglia e il sale e amalgamare.
Riscaldare il forno a 175 gradi. Trasferire l'impasto nella sac a' poche con bocchetta tonda di circa 1/2 cm e formare dei dischetti di 2 1/2 cm. Cuocere i biscotti per circa 10 min con forno statico. Fateli quindi raffreddare.
Ho messo il ripieno al cioccolato tra i due biscotti e per ottenere una forma piu' regolare li ho poggiati uno sopra all'altro mantenendo, in entrambi i biscotti, la base in basso.
Visto che avevo poco tempo e il ripieno era ancora liquido l'ho messo per pochi minuti in freezer e poi ho cercato di distribuirne ancora un po' intorno ai biscotti con la punta di un coltello.

Per la glassa: mettere in un pentolino un cucchiaio di burro e poi il cioccolato, una volta sciolto (avete visto cosa ho combinato!) lasciarlo raffreddare finche' diventi tiepido.

Immergere i biscotti nel cioccolato usando una forchettina oppure se volete provate con due stecchini. Decorare con i pistacchi. I dolcetti si conservano in frigo o in luogo fresco per tre giorni.

For Liverpuddlians and English speaking people everywhere …

Chocolate and pistachio cookies

Title
How to throw away 600 gr of high-quality chocolate

I have quite a number of female friends who shower me with praise whenever I pass an exam or make something to eat, some of them would even go further and say: " How did you do it??!!!" as if what I make is out of this world, how sweet! Yes, I have I have a lot of friends who love me. I really can't complain, friendship gives me great satisfaction :))
That said, I wish to talk to you about saturday afternoon and the cookies I made; I studied all summer and I was dying to try a new recipe. I choose one of Martha Stewart's as usual because she is a sure thing....I am much less so.
To tell the truth, I am always divided between two passions, studying and cooking, therefore if I neglect the first I don't take any exams, if I neglect the second I make such big mistakes that I shouldn't confess, especially here, but I really can't resist:-D
Saturday morning I bought 200gr of chocolate to make the glaze while my husband insisted on buying another 400gr, saying that it's better to always have a big supply of chocolate at home!
I had just completed the most demanding part of the recipe, which is quite easy, when I began to melt the chocolate....

At this point if a friend of mine were to ask me "How did you do it?" I will answer that:
1) I put chocolate in the microwave, as I saw it done in a chocolate class. After a few minutes a hard and shapeless mass formed so I threw everything away
2) I put the second 200gr of chocolate in a bowl, over a pan of simmering water and threw out the second mass
3) Defeatedly, I put for the third time another 200gr of chocolate in the microwave: same mass!
4) I called Gianni on his cell phone and asked him to bring home more chocolate
At the end I rememberd that in the past I followed a method which is generally not recommended and that worked right away, I put chocolate in a small pan with a Tbs of butter. On very low heat I melt it slowly, holding the pan about 30 cm above the flame. Luckily it went well:))

This is how I did it, friends! After melting 800gr of chocolate I finally cleaned the kitchen and prepared the camera to take the picture on the following day.
Sometimes I do well in life but how difficult it can be!!!!!
As for the first photo I didn't make a big effort, I liked the original one so much that I tried to imitate it. What do you think? Can it compete with Martha's?
The following photos are a little different.....

Yield
Makes 15

Ingredients

1/2 cup sugar
2 large egg yolks, lightly beaten (I substituted the yolks with 2 Tbs cream)
3 ounces semisweet chocolate, melted and cooled
4 ounces salted shelled pistachios (about 1 cup), ground to a paste in a food processor
1 large egg white
1/8 teaspoon pure vanilla extract
Pinch of coarse salt
6 ounces bittersweet chocolate, chopped
1 tablespoon vegetable shortening
For the garnish: slivered, unsalted, shelled pistachios (optional)
Directions

Make filling: Bring 1/4 cup sugar and 1/4 cup water to a simmer in a small saucepan over medium heat, stirring until sugar has dissolved; set aside.
(I melted chocolate with sugar and cream)

Put egg yolks in the heatproof bowl of an electric mixer set over a pan of simmering water. Whisk by hand until yolks are warm to the touch, about 2 minutes. Fit mixer with the whisk attachment. Mix yolks on medium speed; pour in sugar syrup. Raise speed to high; mix until mixture is cool and fluffy, about 3 minutes. Reduce speed to medium; drizzle in melted chocolate. Refrigerate until firm, about 45 minutes.

Make cookies: Put pistachio paste and rest of sugar in the clean bowl of an electric mixer fitted with the paddle attachment. Mix on medium speed until smooth. Mix in the egg white, vanilla, and salt.

Preheat oven to 350 degrees. Transfer dough to a pastry bag fitted with a small (about 1/4 inch) plain round tip (such as Ateco #10). Pipe 1-inch rounds onto a baking sheet lined with parchment paper, spacing about 1 inch apart.

Bake cookies until firm and golden around edges, about 10 minutes. Transfer on parchment to a wire rack, and let cool completely.

Place cookies, bottom sides up, on a wire rack set over a baking sheet. Spread 1 to 1 1/2 teaspoons chocolate filling on bottom of half of the cookies. Sandwich with remaining cookies. Freeze 1 hour.

Make glaze: Melt chocolate in a heatproof bowl set over a pan of simmering water, stirring occasionally. Remove from heat. Add shortening; stir until combined. Let cool, stirring, until mixture is lukewarm.

Using a chocolate fork or regular fork, hold 1 cookie at a time above bowl of chocolate glaze. Spoon glaze over cookie, letting excess drip back into bowl. Transfer to a wire rack set over a baking sheet. Garnish with slivered pistachios. Refrigerate until set, 5 minutes. Cookies can be refrigerated in single
layers in airtight containers up to 3 days.

Cook's Note

Note: The yolks in the filling are not fully cooked; this recipe should not be prepared for pregnant women, babies, young children, the elderly, or anyone whose health is compromised.


lunedì 25 luglio 2011

I Love Puglia!


Foglie all'olio d'olivaIMG_3983


L'ultimo post risale al 10 Maggio: non volevo pensarci ma proprio non riesco a non fare i conti con il tempo che passa. Eppure ripensando ai mesi trascorsi mi sento "insolitamente" soddisfatta...Sì, non è da me e chi mi conosce lo sa, ma solo in questo momento, mentre sto scrivendo, mi rendo conto di aver fatto tante cose e di aver realizzato qualche piccolo sogno. Ho studiato tanto, con impegno ed ho superato il mio esame brillantemente, era la cosa a cui tenevo di più. E poi ho viaggiato, ho incontrato tanti amici carissimi e dulcis in fundo ho visto, da molto vicino, un ex-Beatle:))) Non avrei potuto chiedere di meglio!
Non ho cucinato, non ho potuto, ma ora sto cercando di preparare di nuovo qualcosa. Ricomincio dalla vacanza in Puglia perchè è stata indimenticabile, per la compagnia e per il cibo; ho incontrato gli amici con cui condivido le vacanze e quelli con cui condivido i concerti e la passione per i Beatles. Ci siamo divertiti tanto, con i pugliesi non ci si annoia mai!
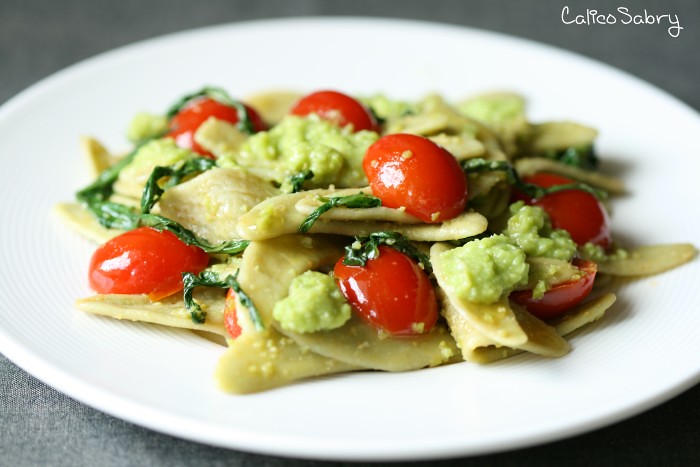
Sabato al supermercato ho trovato per caso la pasta che avevo mangiato proprio il giorno in cui sono arrivata a Barletta, allora l'ho presa al volo e l'ho preparata con i pomodorini e il purè di fave, che mi ricorda un piatto strepitoso della Puglia: fave e cicoria.
Tornando alla pasta, le "foglie all'olio d'oliva" che vedete nella foto, mi ricordano bene quel pranzo sublime (uno dei tanti gustati in quei quattro giorni) iniziato in verità con un cestino di pane caldo e olio pugliese a volontà! Devo dire la verità, tutta: in questi mesi ho mangiato tanto e cucinato poco, ho mangiato così bene da essere costretta a fare un mese di dieta! Non ho il coraggio di pesarmi ma sento che la dieta non è finita...pazienza, prima o poi finirà, questo non è un problema ;))

Song of the day: Maxwell's Silver Hammer

Pasqua a Barletta
Easter in Barletta

Palazzo della Marra

Il Palazzo della Marra
The Palazzo Della Marra

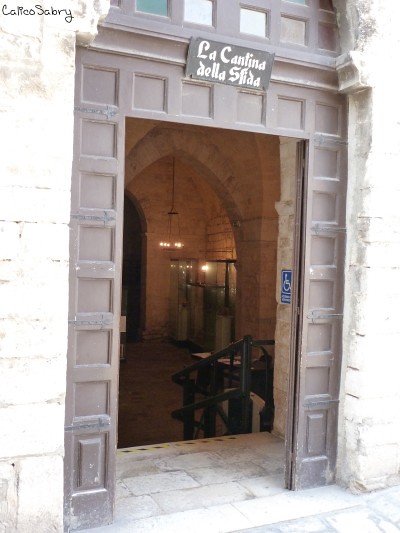
Cantina della Sfida

La Cantina della Sfida

Canne della Battaglia

Il luogo più emozionante: Canne della Battaglia....
The most evocative of places place: Canne della Battaglia, where Hannibal defeated the Romans in 216 B.C.

Pasticceria1P1000358

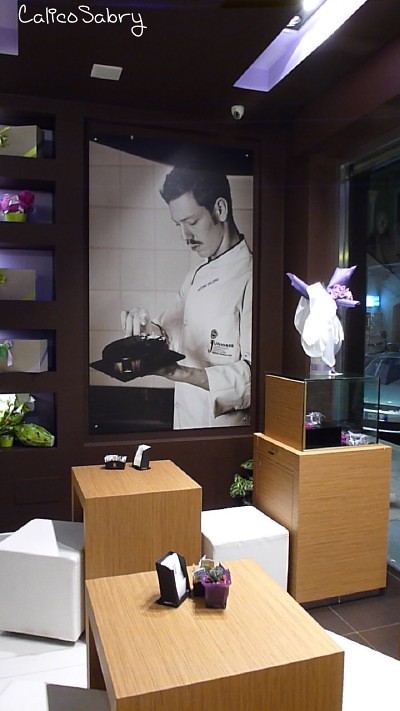
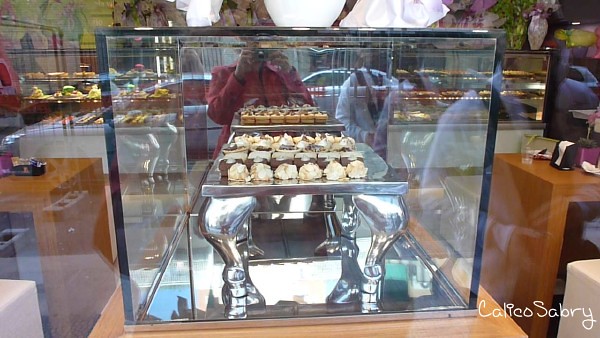
Una sorpresa inaspettata: a Barletta c'è la pasticceria di Antonio Daloiso, primo classificato ai Campionati mondiali juniores di pasticceria!
Un unexpected surprise: Giovanni Daloiso who won the Juniores Pastry World Cup and this is his pastry shop in Barletta

Pasticceria2P1000315

La pasticceria è bellissima, i dolci strepitosi e le persone che la gestiscono sono state molto socievoli, raccontandoci con entusiasmo la bella avventura del giovane campione ventiduenne!
The shop is so beautiful, his creations are tremendous and the people who run it were very friendly and willing to tell us about the adventurous experience of the 22 year old champion!


Ingredienti:
150gr pasta
150gr fave surgelate
15 pomodori datterini
un mazzetto di rucola
1 spicchio di aglio
olio d'oliva
pecorino grattugiato

Lessare le fave in acqua bollente salata, scolarle e togliere la buccia. Frullarle con 2 cucchiai di acqua e 1 di olio.
Cuocere la pasta e nel frattempo scaldare l'aglio con l'olio in un tegame, unire i pomodorini tagliati a meta', la rucola e il sale. Cuocere brevemente a fuoco alto. Aggiungere le fave. Saltare la pasta nel tegame e aggiungere il pecorino.

For Liverpuddlians and English speaking people everywhere …

The last time I posted it was the 10th May: I didn't intend to be self critical but I must come to terms with the fact that time goes by quickly and as usual I'm late posting.
And yet, if I think back over the past months I feel unusually satisfied....Yes, it's not like me to be so and the people who know me won't be surprised but only now, as I am writing, do I realize that I managed to do quite a few things and that some little dreams came true. I studied a lot, intensely and I passed my exam with maximum marks, which was the most important thing for me.
Then I traveled around Italy, we visited our best friends and, dulcis in fundo I saw up close a former Beatle that came playing in Rome on the 4th July :))
I couldn't have asked for more!
I didn't cook for the blog unfortunately and only now am I trying to prepare something new again.
I will start by talking about our holiday in Puglia 'cause it was unforgettable in many ways, for the company and the food; I met friends with whom we spend our summer holidays and those with whom I share my passion for the Beatles and the concerts of Paul's. We had so much fun! With people from Puglia you can never get bored!
On Saturday I just happened to find, at my local supermarket, the type of pasta that I had had at a fabulous restaurant on the day I arrived in Barletta; so I quickly grabbed it and made it with cherry tomatoes and broad beans puree. I ate broad beans quite a few times during my holiday because it is used, in Puglia, in a traditional not- to-be-missed dish: broad beans and chichory, which I adore!
Going back to my pasta, the "olive oil leaves" you see in the picture, vividly reminds me of a sublime meal (one among many that we had during those days) that started with a basket of hot freshly baked durum wheat bread served olive oil galore! I must tell the truth, the whole truth: I have eaten a lot over these last few months and not cooked much, I ate so well that I had to be on a diet for a month! I can't get up enough courage to weigh myself but I feel that my diet won't finish soon....never mind, it will finish sooner or later, but this is not a problem ;))

Song of the day: Maxwell's Silver Hammer

Pasta with cherry tomatoes and broad beans puree

Ingredients:

150 gr pasta
150 gr frozen broad bean
15 cherry tomatoes
1 bunch arugula
1 clove garlic
olive oil
grated pecorino cheese

Cook the broad beans in a pan of Walter boiling water for 5 minutes. Drain the beans, remove the skin and smash them with a fork. In a pan heat the garlic with olive oil, add the cherry tomatoes, cut in half and the arugula. Season with salt and saute' on high heat for 5 minutes. Add the fava beans. Cook and drain the pasta then season it with the sauce.

martedì 10 maggio 2011

Strawberry and ricotta cake


Strawberry and ricotta cake 1 3895


Una torta per celebrare l'anniversario, l'ottavo per l'esattezza, di un giorno speciale. Il 10 Maggio del 2003 Sir Paul ci ha onorato della sua presenza con un indimenticabile concerto al Colosseo. E' bello ricordare quell'evento e quella strana sensazione che si prova nel vedere il tuo idolo, da sempre così "distante" per la sua grandezza, che per una volta è a pochi metri da te, in un luogo così suggestivo.
Eppure la Reale Presenza del mito non avrebbe avuto lo stesso effetto su di me se non avessi incontrato, proprio quel giorno per la prima volta, tante persone speciali con cui condividere quei momenti. Per chi non lo sapesse allora eravamo tutti membri freschi freschi di un forum dedicato a Paul McCartney e dopo esserci scambiati e-mails appassionate sull'argomento per mesi, ci sismo incontrati lì, davanti al Colosseo, dove abbiamo siglato il nostro patto di amicizia in attesa dell'uomo che ci ha fatto incontrare.
Dunque il 10 Maggio è il giorno in cui ricevo anzi riceviamo e ci scambiamo bellissime e-mails e telefonate di saluti; un modo per ricordare sempre quei momenti indimenticabili.....

Song of the day: I've just seen a face, la prima della serata se non sbaglio.........

Strawberry and ricotta cake 2 3918


Strawberry and ricotta cake


Ho trovato la ricetta sul sito di Waitrose. Ho usato le fragole al posto dei lamponi ed ho modificato un pò il procedimento.

Ingredienti:

125gr burro
125gr zucchero
1 uovo
185gr farina
1 cucchiaino di lievito
250gr ricotta
3 cucchiai di miele
1 cucchiaino di estratto di vaniglia
scorza di limone grattuggiata
300gr fragole più qualche fragola per decorare
zucchero a velo
panna montata

Con i primi cinque ingredienti ho preparato una pasta frolla, ho diviso l'impasto in due, l'ho avvolto nella pellicola e messo in frigo per mezz'ora.
In una ciotola ho mescolato la ricotta, il miele, la vaniglia e la scorza del limone.
A questo punto ho steso i due pezzi di pasta, ognuno tra 2 fogli di carta da forno e li ho messi per 10 min in congelatore.
Ho tolto la carta da forno ad un lato del primo disco di frolla, l'ho messa in una teglia da 20cm ed ho tolto il secondo foglio. Sul primo strato di pasta ho messo le fragole tagliate a pezzetti e poi la ricotta.
Ho coperto con il secondo disco di frolla ed ho chiuso la pasta premendo lungo i bordi. Cuocere a 180° per 35 minuti.

For Liverpuddlians and English speaking people everywhere …

Strawberry and ricotta cake

A cake to celebrate an anniversary, the eighth anniversary of a special day. On 10th May 2003 Sir Paul honoured us with his presence holding an amazing and unforgettable concert at the Coloseum. It's always nice to remember that night and the strange feeling you get when you see your idol, ever so "distant" in his greatness, standing a few metres away from me ( I was sitting in the second row) for once in my life, in such an evocative place.
And yet, event with the magical appearance of the living legend himself, the day wouldn't have been as special if some wonderful people hadn't been there. For those who don't know we were all new members of a web forum dedicated to Paul McCartney and after exchanging enthusiastic emails on the subject for months, we met for the first time just in front of the Coloseum where we became friends right away, waiting for the man who made us meet.
So 10th May is the day on which we exchange emails and phone calls and remember that special day we spent together.

I found this recipe on the Waitrose website

125g unsalted butter, at room temperature
125g caster sugar
1 egg
185g plain flour, plus extra for dusting
1 tsp baking powder
250g ricotta
3 tbsp honey
1 tsp vanilla extract
1 lemon, grated zest
3 tbsp mixed cut peel
300g raspberries (I substituted them with strawberries)
3 tbsp icing sugar

Cream the butter and sugar in a bowl for 3–4 minutes until fluffy and smooth. Add the egg and mix well. Sift in the flour and baking powder and stir to combine. Turn the dough onto a lightly floured surface, bring together into a smooth round, and divide in two. Wrap each half in clingfilm and chill for 30 minutes.
Preheat the oven to 180˚C, gas mark 4. In a bowl, beat together the ricotta, honey, vanilla and lemon zest, then fold in the mixed peel. Lightly grease a 20cm loose-bottomed cake tin. Roll out each half of the dough to fit the base of the tin. Press one round into the tin and scatter half the raspberries on top, leaving a 1cm border around the edge. Spoon the ricotta mixture over the raspberries, then place the other round of dough on top and press the edges together.
Bake for 35 minutes until golden and set on top, then allow to cool in the tin for 20 minutes before removing. Serve topped with the remaining raspberries, a good dusting of icing sugar and some whipped cream on the side.

domenica 1 maggio 2011

Strudel salato


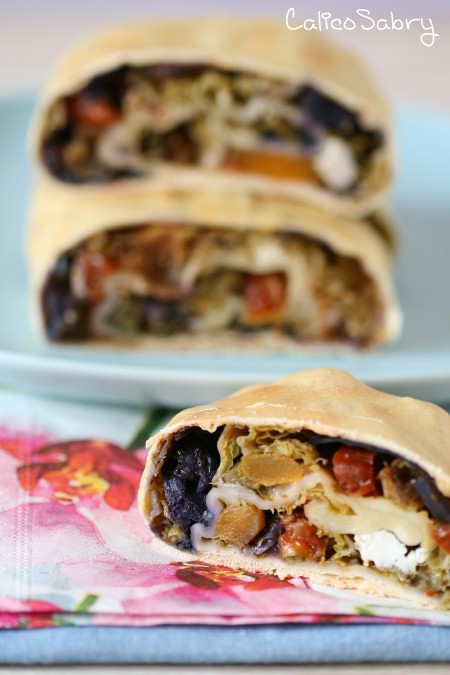
Strudel salato3795

L'inverno è passato, è arrivata la primavera ed io non ho combinato niente, né in cucina e lo si può evincere dal ritardo con cui pubblico il mio post, né fuori.
Per fortuna non mi sono dovuta impegnare più di tanto, sono riuscita a non concludere nulla senza tanto sforzo :-D
Dei mesi invernali mi ricordo solo il freddo e la stanchezza, i giorni passati mi sembrano tutti uguali a parte qualche pausa rilassante in montagna, ad Arezzo con gli amici di Coquinaria ed infine in Puglia.
Scrivere sul blog è spesso una buona occasione per fermarsi a riflettere e così dopo tutto questo discorso sul nulla un pensiero inquietante si sta affacciando alla mia mente e in questa pagina: è forse arrivato il momento di tuffarmi di nuovo nel mio mondo e recuperare il tempo perduto? In teoria l'idea è giusta e mi sembra già di sentire le voci incoraggianti delle mie amiche, in pratica ci sto già provando ma non sono sicura di riuscire a fare tutto e soprattutto, devo ripeterlo, a recuperare.
Vabbè, ho riflettuto già troppo, meglio non esagerare!
Nel frattempo sto continuando a studiare e ora riesco a mettere un nuovo post, è meglio di niente, coraggio Sabrina!

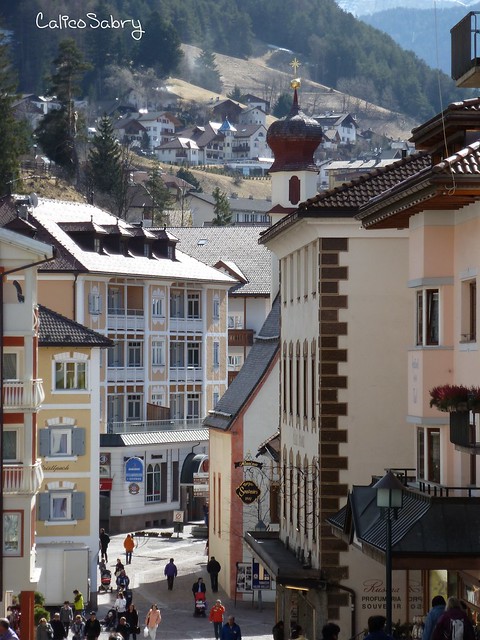
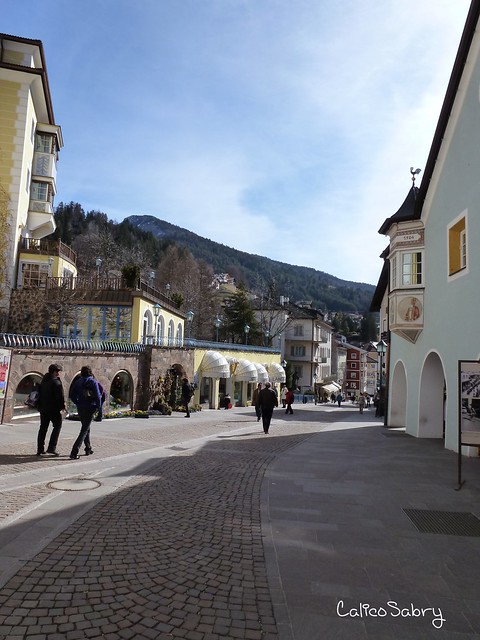
Metto un pò di foto della montagna, un paradiso che si chiama Ortisei e per rendere omaggio al posto, alla sua gente e alla cucina alto atesina aggiungo la ricetta dello strudel salato. La ricetta della pasta è infallibile, è quella di Anneliese Kompatscher ed ha già avuto grande successo ovunque: tra le amiche, nei blog e qui su Coquinaria.

Ortisei 2 P1000093

Ortisei 3 P1000114

Ortisei 4 P1000091

Song of the day: Honey Pie....you are making me crazy, I'm in love but I'm lazy, so won't you please come home :))

Ingredienti:
250 gr farina
1/2 cucchiaino di sale
1 uovo
1/16 l di acqua
olio d'oliva

Ho mescolato l'olio, l'acqua, l'uovo e il sale. Ho versato tutto in una ciotola in cui avevo messo la farina, ho mescolato gli ingredienti e poi ho lavorato la pasta sul tavolo per 2/3 minuti. L'ho avvolta nella pellicola e l'ho lasciata riposare per mezz'ora. Con queste dosi si può fare uno strudel molto grande, la pasta diventa sottilissima e non si rompe, è molto facile e veramente buona. Io ho preferito fare due strudel più piccoli, in questo caso mentre stendo la pasta per il primo strudel lascio nella pellicola quella rimanente per il secondo, così rimane morbida ed elastica.

Ripieno
olio d'oliva
aglio
250 gr zucca
250 gr verza
100gr cavolo rosso
6 pomodori secchi
200 gr ricotta
200 gr di mozzarella o scamorza
origano

Ho cotto le verdure con aglio e olio nel forno a microonde, prima la zucca e il cavolo rosso poi la verza. Il forno a microonde è più veloce e mi consente di usare meno olio, ovviamente va bene anche la cottura nel tegame o nel forno tradizionale, scegliete voi. Anche per le verdure vale lo stesso discorso, usate quelle che avete a disposizione, zucchine, carote, peperoni etc.
Dopo aver steso la pasta, mettere le verdure, i pomodori a pezzetti e i formaggi. Lasciare qualche cm della pasta senza ripieno, con quello chiuderete lo strudel dopo averlo arrotolato. Cuocere a 160° per 40 minuti circa. Dopo la cottura la pasta diventa croccante, a me piace soffice quindi subito dopo averlo tolto dal forno lo copro con un canovaccio e lo lascio raffreddare coperto.

For Liverpuddlians and English speaking people everywhere …

Winter is gone, spring is coming and I haven't achieved anything so far either in the kitchen, and you can gather that from my dwindling posts, nor outside of it.
Luckily I didn't get too busy in the process, I "managed" to be useless without any effort :))
Of the winter months I remember the cold and the fatigue. The past days seem all the same apart from a relaxing break in the mountains, a weekend in Arezzo with my friends from Coquinaria and another four-day stay in Puglia.
Writing here can sometimes be a chance to stop and reflect. Infact after writing these words so far about nothing, an unsettling thought is coming to my mind and now onto this page: is it about time to dive into my world and my passions again, to recover the lost time?
In theory it's a good idea and I seem to hear the encouraging voices of my friends, in reality I'm already trying to do it but I'm not sure I can do it the way I want to and most of all I don't know if I can make up for lost time.
Well, I've been reflecting way too long, this is a food blog and I don't want to be too introspective :-D
In the meantime I'm studying and as for now I'm posting again, Sabrina come on!!

Song of the day: Honey Pie...you are making me crazy, I'm in love but I'm lazy, so won't you please come home :))

I put some photos of the mountain holiday, a paradise called Ortisei. As I wanted to pay special tribute to the place, the people and to the cuisine of Alto Adige I made a savoury strudel. The dough recipe is by Anneliese Kompatscher, I think it is by far the best and the easiest one and it has a great success everywhere in the blogsphere and in the forum of Coquinaria here.

Savoury strudel

Ingredients:
250 gr flour
1/2 tsp salt
1 egg
1/16 l water
2 Tbs olive oil

In a large bowl sift together flour and salt. Mix oil, egg and water in a small bowl. Stir into the flour mixture and knead into a soft dough. Wrap the dough in plastic wrap and refrigerate half an hour. Roll out the dough as thin as possible (about 50 cm long). With this recipe you can make a big strudel or two small ones like I did, by dividing the dough in half. In this case I suggest leaving the second piece of dough wrapped in order to keep it soft, while you roll the first one.

For the filling:
olive oil
garlic
250 gr butternut pumkin
250 gr cabbage
250 gr red cabbage
6 sun-dried tomatoes
200 gr ricotta cheese
200 gr mozzarella or scamorza
origano

Cook the vegetables in the microwave until tender and crispy.
To make the strudel, arrange the vegetables onto the dough, leaving a border all the way around. Roll the dough into a log. Cook at 160 degrees for about 30 minutes.