domenica 9 dicembre 2012

Apple Galette

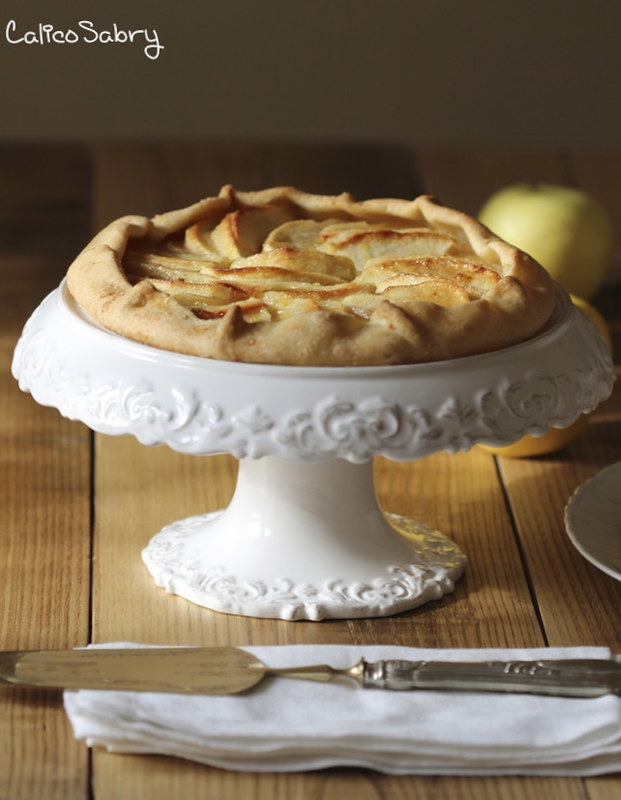
Apple GaletteIMG_0916

Un dolce che mi fa pensare alla Francia...
Mi piace ricordare le mie vacanze in Francia. 
Mi piace la loro lingua, la loro cucina ma soprattutto la loro eleganza che e' la qualita' che mi colpisce di piu' nelle persone.
Sono convinta che l'eleganza sia un dono di natura e che non si possa costruire ma mi diverte l'idea di ritrovarmi ogni tanto in una città raffinata come Parigi, dove l'eleganza si respira ovunque e dove inevitabilmente anche io cerco di essere un po' più elegante, almeno nel modo di vestirmi... certo, lo so che questa qualità non dipende solo da un vestito.
Comunque a Parigi anche comprare una camicia bianca puo' diventare un'esperienza proprio chic...
Una sera a Parigi nel 2009: una vetrina piena di camicie bianche, cosi' belle che non puoi non entrare e provarle. E allora entro, anche se dopo una giornata di visite e lunghe camminate non ho l'aspetto giusto e vedendo la mia immagine riflessa nella vetrina, capisco che sono proprio fuori luogo. 
Comincio a guardarmi intorno intimidita, proverei tutto, finche' vedo una camicia che, in quel momento, (non!) fa per me soprattutto se confronto il mio look con quello della commessa, una vera signora di un'eleganza imbarazzante, come lo e' la camicia. Le dico, con gli occhi bassi "proverei questa ma forse e' troppo elegante per indossarla tutti i giorni..."
Lei mi guarda con un sorriso complice e mi dice una cosa che non dimenticherò mai: "On n'est jamais trop elegant!", non si e' mai troppo eleganti!
Non penso ci sia altro da aggiungere dopo una frase del genere, una bella lezione e infatti senza pensarci un momento di piu' ho preso la camicia, l'ho provata e comprata senza esitazione.
Dopodiché ho pagato e ho aspettato che la mettesse nella busta....che ingenua! La camicia non l'ha messa nella busta, ha preso una scatola bianca, ha messo la camicia in un foglio di carta velina e quindi l'ha poggiata nella scatola. Poi, con un flacone di profumo ha spruzzato la mia camicia per tre volte con un gesto plateale. Ha chiuso la scatola e ha fatto un bel fiocco con un nastro di raso bianco. Praticamente, un rito!!! Quanto mi manca Parigi!
Tornando al dolce, ho trovato la ricetta in un sito americano, quindi mi e' venuta la curiosita' di vedere come si chiami in francese. Ho provato a fare una ricerca su internet scrivendo Galette de pommes ma nessuna delle ricette somigliava  a questa, anzi la maggior parte erano Galette de pommes de terre cioe' di patate. Allora ho provato con tarte de pommes e a quanto sembra le immagini che ho trovato sono simili alla mia ricetta. Insomma ho le idee un po' confuse sulle ricette francesi, forse qualcuna delle mie amiche esperte di cucina mi spiegherà qualcosa sul tema.

Song of the day: Too Much Rain dall'album Chaos and Creation in the Backyard
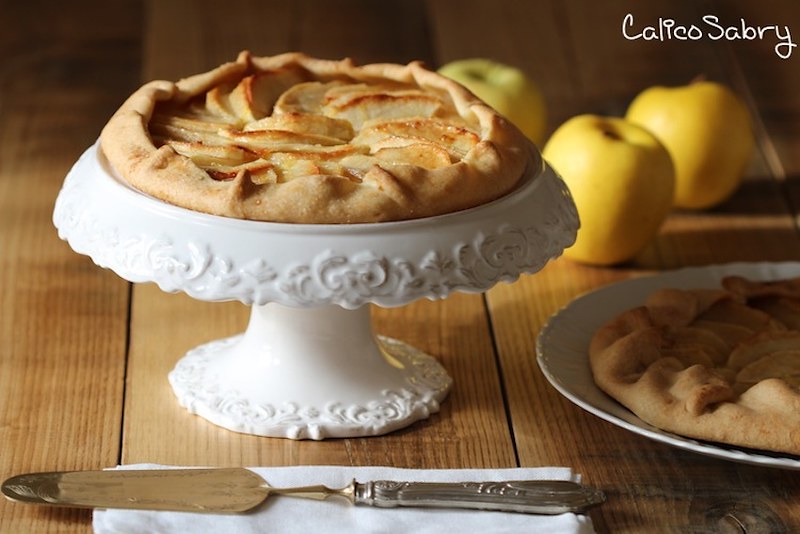
Apple GaletteXIMG_0918

Apple GaletteIMG_0938

Ricetta dal sito Culinate
Base

240 gr farina
1 cucchiaio di zucchero
un pizzico di sale
170 gr burro
7 cucchiai di acqua fredda, o di più se necessaria

Ripieno
115 gr zucchero
1 cucchiaio di scorza di arancia 
3 o 4 mele
1 cucchiaio di burro sciolto (facoltativo)

In una ciotola mescolare farina, zucchero e sale. Impastare il burro con la farina fino a che il composto avrà la consistenza delle briciole. Aggiungere gradualmente l'acqua e finire di impastare. Dividere la pasta in due, avvolgerla nella pellicola e metterla in frigo per mezz'ora.
Mescolare lo zucchero e la scorza d'arancia, io ho usato la scorza di limone.
Stendere la pasta formando due dischi di 35 cm e trasferirli sulla teglia rivestita di carta da forno.
Disporre le mele sulla pasta lasciando un margine di circa 2 cm e spolverizzarle con lo zucchero.
Piegare il bordo della pasta sul ripieno e chiuderlo premendo con le dita lungo tutta la circonferenza.
Cuocere in forno statico a 200° per 40 - 45 min, ruotando le teglie a metà cottura. Se necessario, coprire le teglie con dei fogli d'alluminio durante gli ultimi 15/20 minuti di cottura, per evitare di cuocere troppo la superficie delle torte.

For Liverpuddlians and English speaking people everywhere …

A dessert that makes me think of France...
I like to remember my holidays in France, I have good memories there.
I love their language, their food but most of all their elegance; elegance is the quality that impresses me most in people.
I think, like many people, that elegance is a gift and that you can't create it but it's nice to think that you can spend some time in the sophisticated world of Paris, where you can breathe class everywhere and where inevitably I also try to be more elegant, at least in the way I dress but I know well that elegance is not only in the clothes you wear but also in how you carry yourself and interact with others.
In Paris, even buying a white shirt can become a chic experience...
One evening in Paris, 2009: a shop window full of white shirts, they are so beautiful that you can't not go in and try them on. So I go in, although after a day of long walks and visits I'm not dressed appropriately and look a bit disheveled. Infact, upon seeing myself in the mirror I understand that I am out of place.
I begin to shyly take a look around, I would wear everything I see, until I spot one that, in that moment, is "not" for me especially if I compare my present outfit with the shop assistant's. She is a real lady of embarrassingly superior elegance.
I ask her if I can try the shirt on, explaining that I need it for work. "Or maybe it's too elegant?", I add innocently.
She looks at me with the smile of a true comrade and tells me something I will never forget: "On n'est jamais trop elegant!"... Of course I decided that I had to have that shirt!
So I paid and then I waited for her to put the shirt in a bag...how naïve!
She didn't put it in a bag, on the contrary she took a white box, she wrapped the shirt in tissue paper and she laid it inside a box. Then, with a bottle of perfume she sprayed my shirt three times, dramatically gesturing like an orchestra conductor. She closed the box and tied a silk ribbon around it. In a word, a ritual! How I miss Paris!
Back to the dessert, I found the recipe on an American website, so I had the curiosity to see what it's called in French. I tried to search on the Internet by writing Galette de pommes but none of the recipes I found looked like mine. On the contrary most of the recipes were galettes de pomme de terre that is potatoes. 
Then I tried with Tarte de pommes and in this case the recipes were more similar to mine.
Well, I'm a bit confused as far as French cuisine is concerned, maybe some of my expert cooking friends will certainly be able to make things clear for me.

Song of the day: Too Much rain from Chaos and Creation in the Backyard

Recipe taken from: Culinate
Ingredients

Dough
2 cups all-purpose, unbleached flour
1 tsp. sugar
¼ tsp. salt
12 Tbsp. cold unsalted butter, cut into ½-inch pieces
7 Tbsp. ice water, plus more as needed
Filling
½ cup sugar
1 Tbsp. orange zest
3 to 4 apples (such as Jonagold or Pink Lady), peeled, cored, and cut into ¼-inch slices
1 Tbsp. melted butter (optional)

Steps
Make the dough: In a large bowl, stir together flour, sugar, and salt.
Using your hands, rub a third of the butter into the flour, until the mixture resembles coarse cornmeal. Cut the remaining butter in with either your fingers or a pastry blender, leaving these pieces larger, about the size of peas.
Drizzle ice water over the flour-butter mixture in stages, about a third at a time, mixing the dough with your fingers and gently pressing it together. If there is still a lot of flour in the bottom of the bowl, add a little more ice water.
Once the dough has come together, press it into a loose ball. Divide the ball in half, wrap in plastic wrap, and press each ball into a disk. Refrigerate at least 30 minutes before rolling out the dough for the galette.

In a small bowl, mix together the sugar and orange zest and set aside.
Make the galette: On a lightly floured surface, roll out one of the dough disks into a 12- to 14-inch circle, about ⅛ inch thick. Brush excess flour off both sides of the dough and transfer the pastry to a parchment-lined baking sheet.
Arrange the apple slices on the dough, leaving a ¾- to 1-inch margin on the outside. Fold the overhanging dough over the fruit, at 1- to 2-inch intervals, pressing the dough gently into itself. Brush the apples and dough with melted butter, if using, then sprinkle with the orange sugar.
Preheat the oven to 400 degrees.
Bake in the center of preheated oven for 40 to 45 minutes, rotating the tart after 20 minutes to ensure even browning of the crust. When the galette is done, the apples will be soft when pricked with the end of a paring knife and the crust will be a rich, golden brown.
Cool on a rack for 15 minutes before serving. Serve warm with lightly sweetened whipped cream or vanilla ice cream.
Notes

You can use any kind of fruit that’s solid enough to hold its shape while baking: pears, plums, peaches, etc.


domenica 21 ottobre 2012

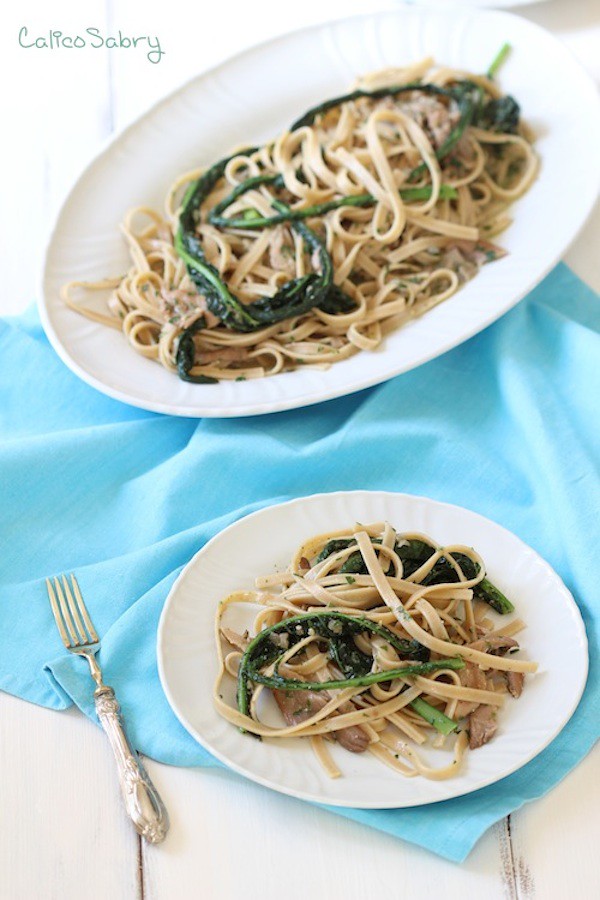
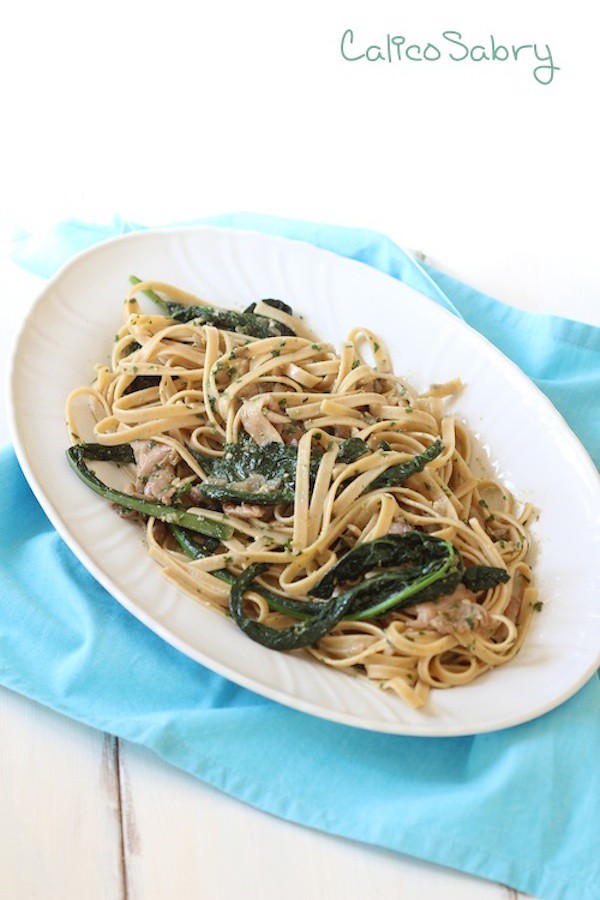
Fettuccine con pesto di erbe aromatiche, cavolo nero e funghi

Fettuccine al timoprovaIMG_0797

Giorni fa ho deciso di dare un tocco speciale ai miei piatti con le erbe aromatiche fresche. 
Niente di nuovo o di particolarmente sconvolgente, nel senso che qualsiasi chef o appassionato di cucina le usa abitualmente e lo farei anch'io ma nei supermercati vicino casa trovo soltanto rosmarino, prezzemolo e basilico e spesso neanche tutt'e tre contemporaneamente. 
Così il mese scorso sono andata alla manifestazione "Cibi d'Italia" al Circo Massimo, proprio con l'idea di comprare qualche piantina da tenere in balcone insieme al basilico, perché almeno quello non può mancare.
Certo, per chi come me non  usa mai le erbe fresche, una pianta di rosmarino a disposizione è un fatto eccezionale! :-D Ma ho voluto fare di più e, nella speranza che sopravvivano tutte, ho comprato il finocchio, la santoreggia, l'erba cipollina e il timo limone, che poi ho usato nella pasta. 
Scusate se sono banale ma per me è tutto una grande novità e ogni foglia che aggiungo è una festa di sapori e profumi. Mi sembra che queste erbe abbiano veramente trasformato i miei piatti; il timo limone è speciale e in questa pasta ci sta divinamente!

Song of the day: Long, Long, Long

Fettuccine al timoprovaIMG_0782

La ricetta è tratta dal sito Vegetarian Times
Ingredienti per 6 persone:

30gr noci
40 gr parmigiano, facoltativo
25 gr prezzemolo
5 spicchi aglio
1 cucchiaio di timo, più 2 rametti
1 cucchiaio di rosmarino, più 2 rametti
4 cucchiai di olio d'oliva
250 gr cavolo nero
350 fettuccine integrali
500 gr funghi pleus
1 cipolla
225 ml brodo vegetale bio


Frullare il prezzemolo, le noci, il timo, il rosmarino. Nella ricetta c'è scritto di aggiungere 3 spicchi di aglio, io invece ne ho usato uno per la cottura dei funghi e due per la pasta.
Aggiungere 3 cucchiai di olio e mescolare.
Bollire il cavolo nero per 5 minuti e scolarlo conservando l'acqua per la pasta.
Aggiungere la pasta, due spicchi d'aglio, il timo e il rosmarino. Cuocere la pasta, scolarla e conservare una tazza di acqua.
Nel frattempo scaldare un cucchiaio di olio, uno spicchio d'aglio e la cipolla tritata. Unire i funghi tagliati a pezzi grossi e cuocere per 12 minuti o fino a che diventino dorati. 
Aggiungere il pesto e cuocere due minuti per far addensare la salsa. 
Aggiungere il brodo e cuocere per altri due minuti. Unire la pasta, il cavolo nero e mescolare. Se necessario unire l'acqua della pasta, condire con il pepe. per noi così è perfetta ma se volete potete aggiungere il parmigiano.


For Liverpuddlians and English speaking people everywhere …


A few days ago I decided that I wanted to give a special touch to my dishes by using fresh herbs.
I know that there is nothing new or particularly revelatory in it, in the sense that any chef or food lover uses them habitually and I would do the same, but at the supermarkets near my house I can only find rosemary, basil and parsley and most times not even the three together.
So last month I went to the Exibition Cibi d'Italia dedicated to the Italian food and wine which took place in the archeological area called Circus Maximus. The idea was to buy a few plants to keep in my balcony, aside my basil plant, because basil, at least, can not be done without.
For those people like me who never use fresh herbs, a rosemary plant is really big deal, for sure! :-D However I wanted to go one step further therefore, hoping they will all survive,  I also both chives, fennel, savory and lemon thyme plants. The last one I used in the pasta recipe you see in the photo.
Sorry for this trivial remark but to me having these ingredients on hand is a new thing and every leaf that I add to my dishes is a feast of flavor and fragrance. I think that they are really making a difference; lemon thyme is special and this pasta was delicious!

Song of the day: Long, Long, Long

Fettuccine with Three-Herb Pesto, Black Kale, and Oyster Mushrooms

Recipe taken from Vegetarian Times
Serves 6

The pesto for this dish is made without Parmesan, which means you can indulge by sprinkling it with a little bit of the pungent cheese, if you like.
¼ cup walnuts
⅓ cup grated Parmesan cheese, optional
¾ cup fresh parsley leaves
5 cloves garlic, divided
1 Tbs. fresh thyme leaves, plus 2 large sprigs, divided
1 tsp. finely chopped fresh rosemary, plus 2 large sprigs, divided
4 Tbs. olive oil, divided
8 oz. black kale (1 bunch), stemmed and coarsely chopped
12 oz. dried tagliatelle or fettuccine
1¼ lb. oyster or other large mushrooms, halved
1 large onion, coarsely chopped (2 cups)
1 cup low-sodium vegetable broth

1. Blend parsley, walnuts, 3 garlic cloves, thyme leaves, and chopped rosemary in food processor until finely chopped. Add 3 Tbs. oil, and blend until smooth. Set aside.
2. Cook kale in large pot of boiling water 5 minutes, or until tender. Remove kale with large sieve, and drain. Add pasta, remaining garlic cloves, thyme, and rosemary sprigs to boiling water, and cook according to package directions until al dente. Reserve 1 cup pasta cooking water, then drain pasta.
3. Meanwhile, heat remaining 1 Tbs. oil in large pot or Dutch oven over medium-high heat. Add mushrooms and onion, and sauté 12 minutes, or until tender and golden. Add pesto, and sauté 2 minutes, or until sauce begins to stick to bottom of pan and turns golden brown. Add vegetable broth, and simmer 2 minutes, or until liquid is reduced by half, scraping sauce from bottom of pan.
4. Add kale and pasta to mushroom mixture, and toss to coat. Stir in reserved pasta cooking water to moisten, if desired. Add Parmesan, if using, and season to taste with black pepper.

giovedì 16 agosto 2012

Gnocchi di ricotta e patate

potato and ricotta gnocchiIMG_5041_3


Solo due parole su questo piatto che merita il massimo dei voti.
Sono gli gnocchi più buoni che abbia mai mangiato; soffici, facilissimi da preparare. Alla fine si aggiungono briciole di pane tostate nel forno con aglio e olio d'oliva, profumatissime! Si unisce il parmigiano e l'insieme è spettacolare, come accade spesso con le cose più semplici quando le abbino in modo nuovo.
Li ho preparati per una cena con amici, eravamo in sei quindi ho raddoppiato la dose ed ho anticipato la cottura. Ho messo gli gnocchi appena cotti in una ciotola con acqua fredda e ghiaccio per un minuto. Grazie come sempre alle amiche del forum Coquinaria per questo suggerimento!
Poi li ho scolati, conditi con olio d'oliva e li ho messi in una teglia in un unico strato. Li ho lasciati in frigo fino ad un'ora prima di servirli.
Nella ricetta originale, per il condimento troverete due verdure invernali che ho sostituito con zucchine e peperoni. A me è piaciuta di più la versione invernale, che ho provato due volte ed è buonissima ma nel frattempo mi accontento di questa e magari penserò a qualche altro abbinamento. Se avete suggerimenti li accetto volentieri.

Song of the day: Ram On

Ricetta dal sito gourmettraveller.com.au

Ingredienti

300 gr di patate
150 gr di ricotta
125 gr di farina
40 gr parmigiano
1 uovo
noce moscata

Condimento

olio d'oliva
aglio
1 peperone rosso
3 zucchine
parmigiano

Pangrattato

120 gr mollica di pane fresco
1 spicchio d'aglio
30 ml olio d'oliva

Lessare le patate e passarle allo schiacciapatate. 
Per velocizzare la ricetta ho pesato 300 gr di patate già sbucciate e le ho cotte nel microonde tagliate a pezzi grandi, con circa un bicchiere d'acqua. In una ciotola lavorare le patate e il resto degli ingredienti. Dividere la pasta in quattro parti e sul piano di lavoro leggermente infarinato, formare dei cilindri di 1 1/2 cm. Tagliare gli gnocchi della lunghezza di 2-3 cm. Lessare gli gnocchi attendendo che risalgano in superficie. Scolarli, metterli in un vassoio e condirli con olio d'oliva.

In una teglia rivestita di carta da forno, versare la mollica di pane precedentemente passata nel mixer. Aggiungere l'aglio tagliato a pezzetti e condire con l'olio. Cuocere in forno a 180 gradi per 6-8 min o se preferite, tostate il pane in un tegame antiaderente fino a che sia dorato e croccante.

Pulire il peperone, tagliare le zucchine in quattro parti nel senso della lunghezza ed eliminare la parte bianca in eccesso. Tagliare le verdure a dadini, cuocerle a fuoco alto in un tegame con aglio e olio girandole spesso.
Saltate delicatamente gli gnocchi nel tegame, per amalgamarli al condimento.
Servite con il pangrattato e il parmigiano.

For Liverpuddlians and English speaking people everywhere …

Just a quick note on this dish, that truly deserves top marks!
These are the best gnocchi I have ever had, they are soft, absolutely easy to make and also, the combination of the bread crumbs with the Parmesan cheese is spectacular.
I made them for some friends who came for dinner, so I doubled the recipe and made them in advance. I put the cooked gnocchi in a bowl of cold water with ice cubes for a minute. Thanks you to my friends from Coquinaria for this tip! Then I drained and seasoned them with olive oil and put them in the fridge until I was ready to use them.
The original recipe for the sauce features winter vegetables which I substituted with fresh seasonal produce of my choice.

Song of the day: Ram On

Recipe taken from: gourmettraveller.com.au
Changes I made to the original recipe: I omitted the butter and the onion and I substituted the broccoli and the radicchio with 1 red pepper and 3 zucchini

Potato and ricotta gnocchi

Ingredients

80 ml (1/3 cup) extra-virgin olive oil
1 onion, thinly sliced
4 garlic cloves, finely chopped
1 long dried red chilli, seeds removed, finely chopped
230 gm broccoli, cut into florets, thinly sliced
½ radicchio, leaves coarsely torn
50 gm butter
To serve: finely grated parmesan
Ricotta gnocchi
300 gm waxy potatoes, such as Dutch cream or bintje, scrubbed
150 gm ricotta
125 gm plain flour
40 gm (½ cup) finely grated parmesan
1 egg
Pinch of nutmeg
Pangrattato
120 gm coarse fresh white breadcrumbs
1 garlic clove, finely chopped
30 ml extra virgin olive oil
Preparation method
Serves 4

Prep time 40 mins, cook 30 mins

Preheat oven to 180C. For ricotta gnocchi, cook potatoes in a large saucepan of boiling salted water until tender (15-20 minutes). Drain and cool slightly, then peel and pass through a potato ricer into a large bowl (alternatively, mash the potato). Pass ricotta through a course sieve into potato, then add remaining ingredients, season to taste and gently mix until just combined. Divide dough into four pieces and roll each on a lightly floured work surface to a 1.5cm-thick cylinder. Cut into 2.5cm lengths and cook, in batches, in a large saucepan of boiling salted boiling water until gnocchi float to the surface (1-2 minutes). Remove with a slotted spoon, refresh, and set aside on a lightly oiled tray.

Meanwhile, for pangrattato, combine ingredients in a large bowl, spread over an oven tray and bake, stirring occasionally, until golden (6-8 minutes).

Heat oil in a large frying pan over low heat, add onion, garlic and chilli and stir occasionally until caramelised (5-6 minutes). Add broccoli and radicchio, increase heat to medium-high and stir occasionally until broccoli is tender (4-5 minutes). Add butter and stir until melted. Add gnocchi, toss until golden and combined (2-3 minutes), season to taste. Divide among plates, scatter over pangrattato and grated parmesan and serve immediately.


martedì 10 luglio 2012

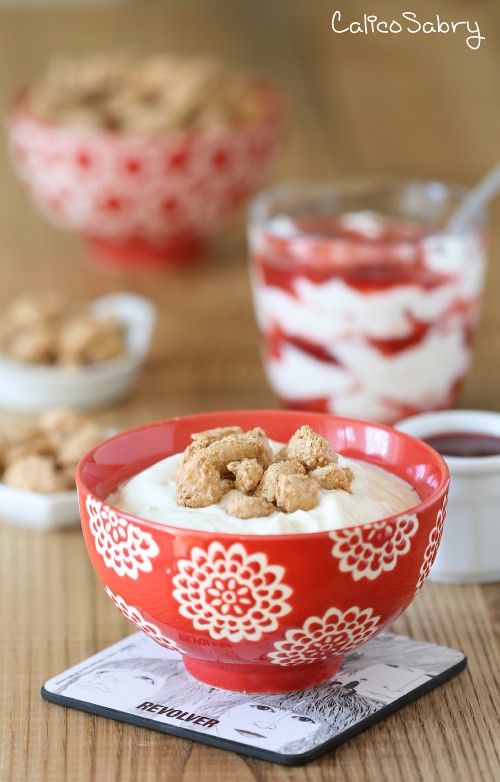
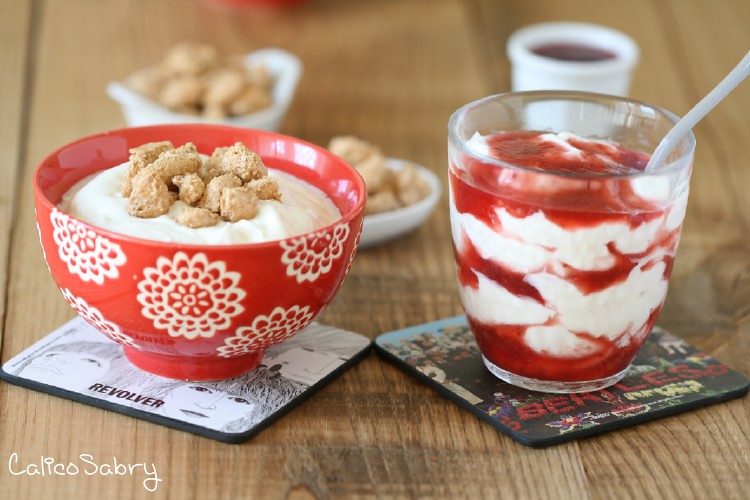
Yogurt e mandorle glassate alla cannella

yogurtIMG_4967_2


Mangio quantità incalcolabili di yogurt: tanti vasetti poggiati l'uno sull'altro, formano delle torri dondolanti nel mio frigo. Credo di aver assaggiato tutti o quasi tutti gli yogurt in commercio; non sono troppo esigente, mi accontento di uno yogurt  non troppo aspro, qualsiasi marca va bene purché contenga zucchero e non il dolcificante.
Sono abitudinaria infatti mangio preferibilmente yogurt alla fragola. Ultimamente rubo gli yogurt a mio marito, quindi alterno fragole a yogurt cremosi con cereali, cioccolato e mandorle.
Per preparare lo yogurt ho usato una vecchia yogurtiera che ho ritrovato in cantina dopo tanti anni; non l'ho usata molto perchè lo yogurt veniva troppo liquido e aspro.
Poi ho assaggiato uno yogurt speciale, preparato dalla mia amica Maria Grazia, membro del forum Coquinaria nonché medico dietologo e quindi particolarmente sensibile all'alimentazione sana.
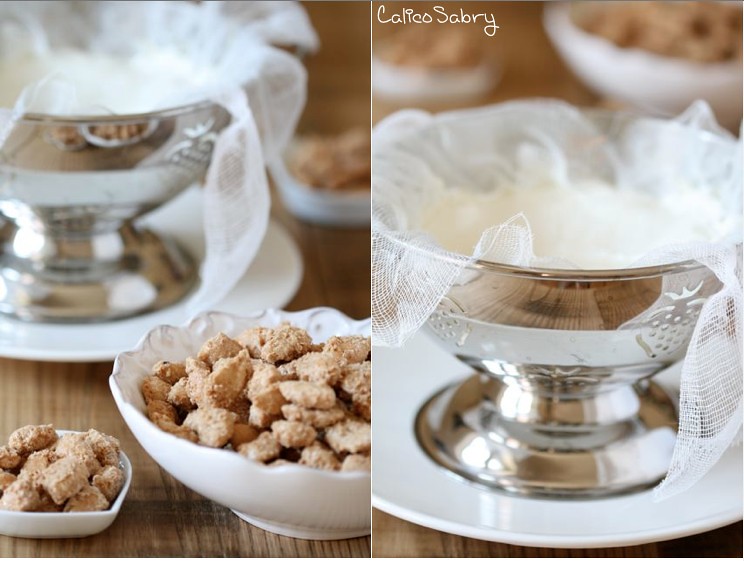
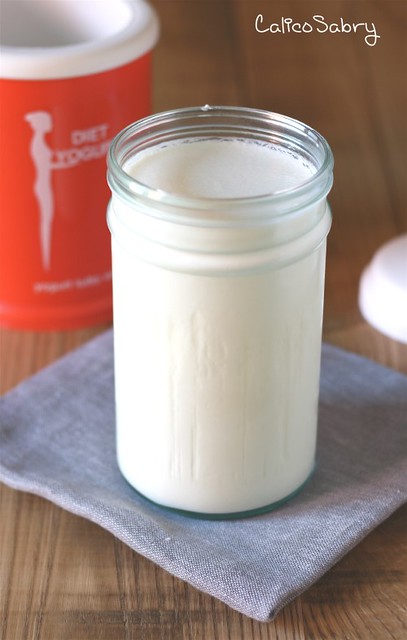
Trovo che questo yogurt sia perfetto, più buono di quelli che si comprano, denso, cremoso e dolce. Come vedete dalla foto, il segreto è lasciarlo filtrare per un paio d'ore fino a che non abbia raggiunto la densità che preferite.
Per accompagnare questa delizia, ho preparato delle mandorle glassate usando una ricetta che ho trovato in un blog che si chiama Melskitchencafe, in cui troverete anche la sequenza di foto esplicative.
È buonissimo anche con la marmellata di fragole; l'avevo preparata un mese fa ma era venuto troppo liquida, un fallimento totale! Invece con lo yogurt così denso è perfetta!
Inutile dire che abbiamo finito tutto lo yogurt, sgranocchiando nel frattempo un numero esagerato di mandorle. Vabbè, era il primo esperimento, la prossima volta non andrà così, spero ;))

Song of the day: Heart of the country

Yogurt Schermata 06-2456089 alle 21.52.49

Yogurt
1 vasetto di yogurt bianco intero
1litro di latte intero a lunga conservazione

Mescolare delicatamente il latte e lo yogurt e metterlo nella yogurtiera per 6/8 ore. Filtrarlo per circa due ore.

Candied Cinnamon & Sugar Almonds

Ingredienti:
1 albume
1 cucchiaino di acqua fredda
1/2 cucchiaino di estratto di vaniglia
2 tazze di mandorle pelate
1/2 tazza di zucchero di canna
1/4 cucchiaino di sale
1/2 cucchiaino di cannella

In una ciotola montare l'albume a neve, aggiungere l'acqua e la vaniglia e montare di nuovo. Unire le mandorle e mescolare delicatamente. In una seconda ciotola mescolare lo zucchero, il sale e la cannella. Versare nel composto di albume e mandorle e mescolare bene. Disporre le mandorle in un unico strato, su una teglia rivestita di carta da forno. Cuocere per 50 min/1 ora a 250°, girando le mandorle ogni 15 min circa.
Le mie modifiche alla ricetta originale: ho messo 2 1/2 tazze di mandorle e 1 cucchiaino di cannella, ho usato zucchero bianco e muscovado. Se non avete i cucchiaini americani, 1/4 corrisponde a circa 2 pizzichi di sale. Infine, ho cotto le mandorle a 250° C, in realtà si trattava di 250° F che corrispondono a circa 120° C. Me ne sono accorta solo il giorno dopo, leggendo le domande e i commenti al post di Mel. La ricetta è riuscita benissimo anche così ma vista la notevole differenza nei gradi vi consiglio di provare con una temperatura più bassa.
Per controllare la cottura prendete una mandorla e premete con due dita, se la glassa è asciutta le mandorle sono pronte.

2 yogurtIMG_4968

For Liverpuddlians and English speaking people everywhere …

I eat uncountable quantities of yogurt: dozens of cups, stacked up in my fridge, forming swaying towers. I think I've tasted all or almost all the yogurts available at the supermarkets; I'm not too demanding,  I 'm happy with a yogurt that is not too sour, any brand is ok as long as it contains sugar, not sweetener.
I'm a creature of habit in fact I prefer to eat strawberry yogurt.
Lately, I've been stealing my husband's yogurt, so I alternate between strawberry and chocolate, crunchy cereals and nut yogurt.
To make yogurt I used an old yogurt maker that I found in the cellar after many years; I haven't used it much because the yogurt came out too liquidy and sour.
Then I tasted a special yogurt, made by my friend Maria Grazia, a member of the forum Coquinaria, as well as a medical dietician and therefore particularly concerned with healthy eating.
I find this yogurt is just perfect, better than the ones I buy, it is so creamy and sweet. As you can see on the photo, I strained it in a colander lined with a gauze for a couple of hours until it became thick.
To accompany this delight, I made some Candied Cinnamon & Sugar Almonds, using a recipe I found on a blog called Melskitchencafe, which shows the step by step photos.
It was also really good with my strawberry jam. I made this jam in May but it came out too liquidy, it was a total failure!  However with this very creamy yogurt the final result was perfect!
Needless to say that we ate it all up, crunching an exaggerated number of almonds. Well, it was my first experiment, next time I will behave myself and not eat too much!!

Song of the day: Heart of the country

3 yogurtIMG_4897_2
Homemade yogurt

Ingredients
1 liter uht whole milk
125 ml plain yogurt
Mix the yogurt with milk by stirring gently. Pour the mixture into the glass jar. Place the jar into the yogurt maker and a leave a minimum of 6 to 8 hours or overnight until set. Strain the yogurt for about two hours.

Candied Cinnamon & Sugar almonds

Ingredients:
1 egg white
1 teaspoon cold water
½ teaspoon pure vanilla extract
2 cups unsalted almonds
½ cup packed light brown sugar
¼ teaspoon salt
½ teaspoon cinnamon


Preheat oven to 250 degrees. Line a large (11X17-inch) rimmed baking sheet with foil and lightly spray with cooking spray.

In a large bowl, beat the egg white until stiff peaks form. Add the water and vanilla and beat again until stiff. Add the almonds to the mixture and stir gently to coat the almonds with the egg white mixture. In a small bowl, mix the brown sugar, salt and cinnamon. Add this mixture to the almonds and stir gently to mix well. Pour the almonds out onto the prepared baking sheet and carefully spread them out into a somewhat even layer. Place the baking sheet in the oven and bake for about an hour, stirring/flipping every 15 minutes, until the almonds look and feel dry. To check to see if the almonds were done, I carefully picked one up in my fingers and when I pressed around it, I didn’t get any wet sugar on my hands. The coating on the almond felt hard and crunchy. Cool completely before serving or packaging.


venerdì 25 maggio 2012

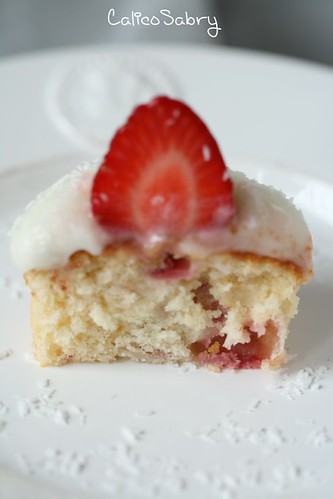
Cupcakes al cocco e fragole


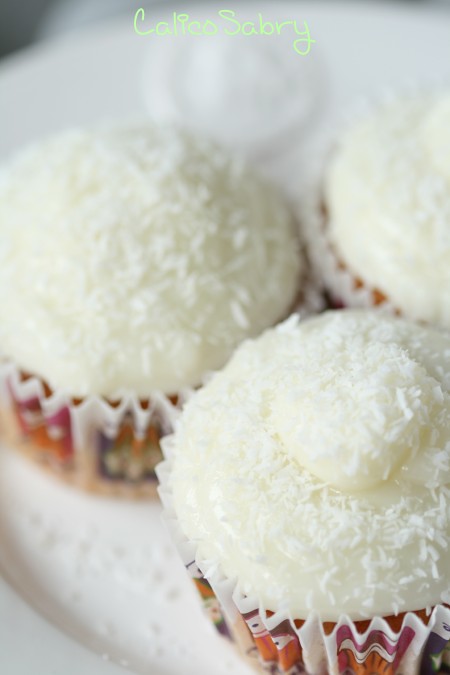
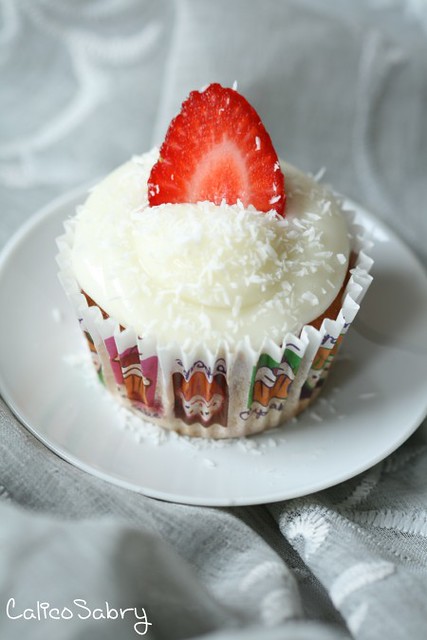
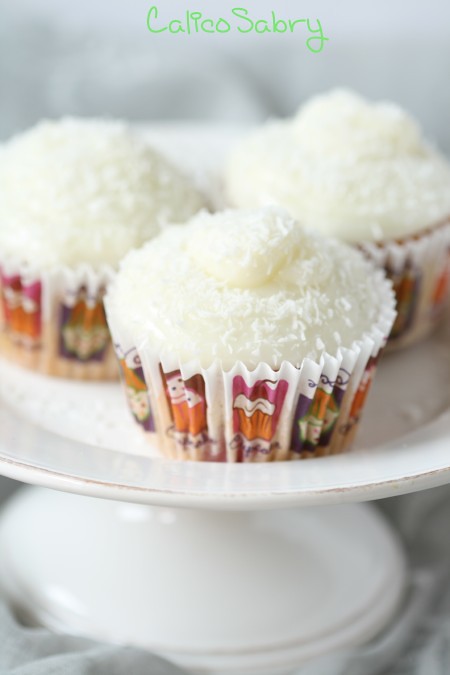
Cupcakes cocco e fragoleIMG_4725

Quando arriva la primavera la bilancia diventa una nemica, ma è tutto regolare,  ogni anno è così. Solo quando comincio a sentire il caldo e devo separarmi dal cappotto, divento improvvisamente consapevole dei miei 65 kg. 
Ma perchè proprio adesso che il tempo sta migliorando mi sono andata a cercare una nuova preoccupazione ????!!!! Perchè rovinare questi giorni di sole, dopo un inverno lungo e freddo, con dei pensieri inquietanti? 
Quanto durerá questa preoccupazione? Beh, le previsioni annuali sono buone, in genere dura poco; giusto il tempo di abituarmi alla nuova stagione, tra meno di un mese avrò già buttato tutto alle spalle  e sarò tornata alle vecchie abitudini: mangiare bene senza contare troppo le calorie :-D
Nel frattempo, spinta dalle suddette motivazioni, ho dedicato un paio d'ore totali alla ricerca di una ricetta dolce che contenesse poco burro. Ne ho trovata una fantastica che ne richiede solo 55 gr per 12 o 14 cupcakes! L'ho già provata due volte in un mese, troppo buona!

Song of the day: We can work it out...

cupcakes cocco e fragoleIMG_4712

Cupcakes al cocco e fragole

Ingredienti:
120 gr zucchero
55 gr burro
1 uovo
180 ml di yogurt
2 cucchiai di cocco
1 cucchiaino di estratto di vaniglia
170 gr di farina
1 1/2 di lievito
1/4 cucchiaino sale (circa metà cucchiaino raso)
1/4 cucchiaino bicarbonato
1 tazza di fragole, tagliate a pezzetti

cupcakes cocco e fragoleIMG_4732


Scaldare il forno a 180 gradi. 
Mescolare la farina con il lievito, il sale e il bicarbonato.
Lavorare il burro con lo zucchero. Aggiungere l'uovo, la vaniglia, lo yogurt, il cocco e mescolare. Aggiungere la farina e mescolare, infine unire le fragole. Suddividere il composto negli stampini di carta e metterli negli stampini in alluminio o in una teglia per muffins.
Alla ricetta originale ho aggiunto il cocco e al posto della farina auto lievitante ho usato quella normale.

Glassa
formaggio cremoso light
zucchero a velo
cocco 
fragole

Ho mescolato una vaschetta di formaggio cremoso con lo zucchero a velo, senza pesare gli ingredienti. Il formaggio light che uso io non è denso quindi richiede molto zucchero. Vi consiglio di iniziare con piccole quantità di formaggio e aumentare gradualmente, per ottenere una glassa compatta da poter distribuire sui cupcakes con la sac à poche.

cupcakes cocco e fragoleIMG_4743

English version coming soon.....

lunedì 9 aprile 2012

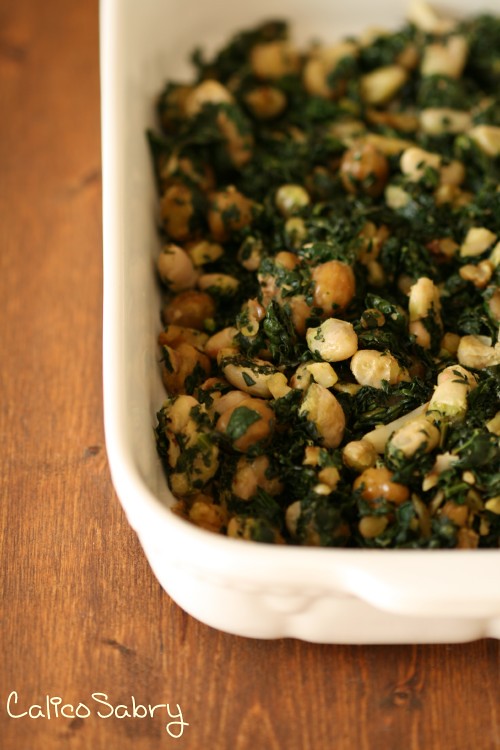
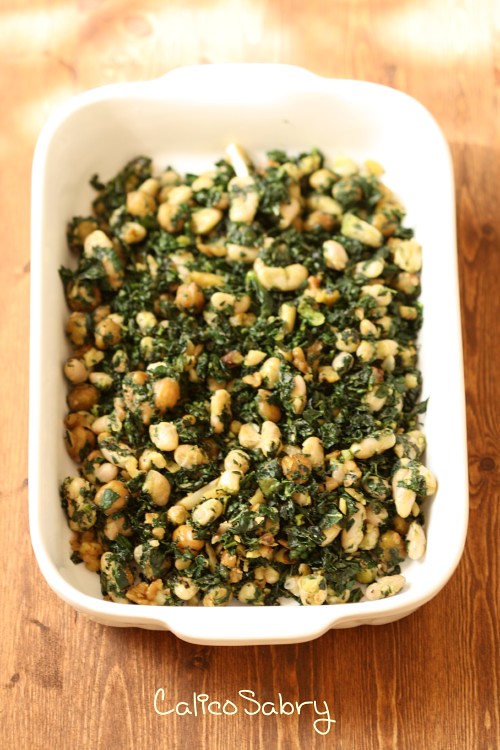
Insalata di ceci e cavolo nero


cavolo nero e ceciIMG_4687

Non ho una passione per i legumi e per questo motivo non mi sono mai preoccupata di cercare una ricetta nuova. Forse è più semplice scegliere un piatto nuovo se contiene ingredienti che mi piacciono quindi fino ad ora non sapevo proprio cosa farci con i legumi anche se ho imparato quanto sia importante seguire un'alimentazione varia e sana. Quindi almeno i ceci, che sono i miei preferiti ho continuato a mangiarli, aggiungendoli alle vellutate di verdure. Quelli che uso io, sono molto grandi e di ottima qualità, me li porta la mia amica Cristina che mi rifornisce anche di zucca bio durante l'inverno.
Questa ricetta, che ho trovato in uno dei miei siti preferiti 101cookbooks, mi ha fatto capire che se mi affido ad una cuoca creativa come Heidi, alla fine mi viene anche la curiosità di provare una ricetta con un ingrediente che meritava più impegno; così ora ho deciso che i ceci non possono finire sempre nella solita minestra!
Ci sono diversi punti nella ricetta che mi sembrano originali; il primo è il fatto di ripassarli nell'olio, saltandoli senza toccarli con il cucchiaio per evitare che si rompano e poi farli dorare. Il secondo punto è l'aggiunta del cavolo nero crudo che, se tagliato molto sottile, si cuoce in pochi minuti e diventa croccante. Infine il succo di limone e il parmigiano, che ho già usato insieme in altri piatti e che in questo caso è un tocco finale perfetto.

Song of the day: Live and Let Die, oggi ho bisogno di energia....

Cavolo nero e ceci2IMG_4689

170 gr cavolo nero, tagliato sottile
2 cucchiai di olio d'oliva
2 o 3 manciate di ceci
sale
45 gr noci
1 spicchio d'aglio
noce moscata
I cucchiaio di succo di limone
scorza di limone grattugiata
15 gr parmigiano grattugiato

Nella ricetta originale ci sono i fagioli bianchi ma Heidi suggerisce di provare anche con altri legumi; io ho preferito i ceci, a cui ho tolto la buccia con molta pazienza. In alternativa ho usato anche i fagioli cannellini che mi sono piaciuti ugualmente.
Inoltre non ho rispettato il peso di ogni singolo ingrediente ma per correttezza ho riportato fedelmente le quantità indicate nel suo sito.
Ho scaldato l'aglio e l'olio in un tegame grande, ho aggiunto i ceci e li ho fatti saltare a fuoco alto fino a farli dorare. Ho aggiunto il cavolo nero, le noci, il sale e la noce moscata ed ho fatto cuocere il cavolo per pochi minuti. Prima di servire ho aggiunto il succo di limone e il parmigiano.

For Liverpuddlians and English speaking people everywhere …


I haven't got a passion for legumes and this is the reason why I didn't care to search for a new recipe.
Maybe it's easier for me to choose a new dish if I look for ingredients that I like. So until now I didn't really know what to do with legumes even if I've learnt how important it is to follow a healthy and varied diet. At least the chickpeas, which are my favourites I kept on eating them, adding them to my veggie soup to make it more creamy.
The ones I use, are big and of good quality; my friend Cristina who also provides me with organic pumpkin in the winter, brought me the chickpeas you see in the picture.
This recipe, which I found in one of my favourite sites 101cookbooks, made me realize that when I rely on a creative cook like Heidi, I can even get the curiosity to try a recipe with an ingredient that deserved more care. So now I have decided that chickpeas can't just end up in the same soup!
There are "different points" in the recipe that seems new to me and give character. First you stir fry them in olive oil, I sautéed the chickpeas without using a wooden spoon in order to avoid breaking them and to cook them until golden brown.
Second point: you add raw kale in the pan, without boiling it as we would normally do here, and if you cut it very thinly it cooks very quickly and even becomes crunchy. Finally, we have lemon juice and Parmesan cheese which I have already used together in other dishes. And I assure you that this time they worked perfectly again.

Song of the day: Live and Let Die


1/2 bunch / 6 oz / 170 g dino kale or lacinato kale, remove stems
2 tablespoons extra virgin olive oil
2 - 3 big handfuls of cooked large white beans (I used chickpeas)
1/4 teaspoon fine grain sea salt
1/3 cup / 1 1/2 oz / 45 g walnuts, lightly toasted
1 clove garlic, minced
1/8 teaspoon freshly grated nutmeg
scant 1 tablespoon fresh lemon juice
zest of 1 lemon
1/3 cup / 1/2 oz / 15 g freshly grated Parmesan cheese


Finely chop the kale, wash it, and shake off as much water as you can. Set aside.

Heat the olive oil over medium-high heat in the widest skillet you own. Add the beans in a single layer. Stir to coat the beans, then let them sit long enough to brown on one side, about 3 or 4 minutes, before turning to brown the other side, also about 3 or 4 minutes. The beans should be golden and a bit crunchy on the outside.

Add the kale and salt to the pan and cook for less than a minute, just long enough for the kale to lose a bit of its structure. Stir in the walnuts and garlic, wait 10 seconds, then stir in the nutmeg. Wait ten seconds and stir in the lemon juice and zest. Remove from heat and serve dusted with Parmesan cheese.
Serves 2 - 4.
Prep time: 10 min - Cook time: 10 min


giovedì 22 marzo 2012

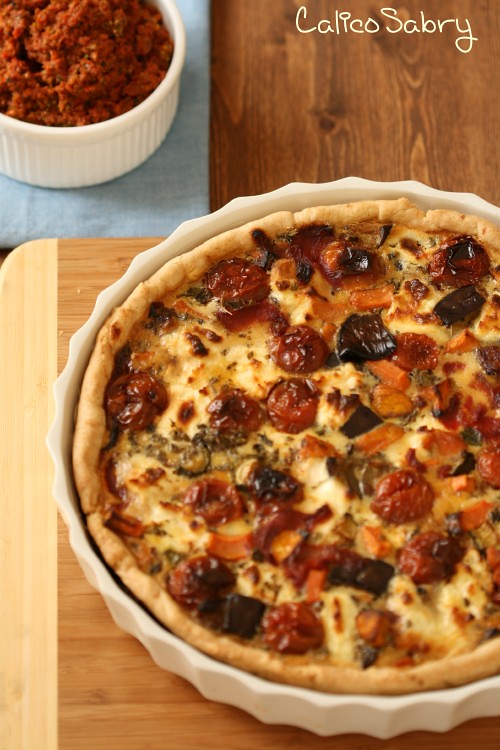
Roasted Vegetable Tart


quiche3IMG_4664_2


I ristoranti non sono l'unico ricordo dei miei viaggi, lo giuro! Ma la quiche vegetariana per me e' legata a Parigi e Londra e non e' un caso, perchè quando mi trovo da quelle parti le quiches me le vado a cercare, qui invece non si trovano facilmente quindi ho deciso di provare a farne una; si chiama Roasted Vegetable Tart ma io preferisco chiamarla quiche, non penso sia un problema visto che la quiche e' sempre salata.
Nel ripieno ci sono melanzane, zucchine, peperoni quindi delle verdure tipicamente mediterranee eppure quel profumo intenso delle verdure che  diventa così particolare insieme alla pasta brise', mi ha portato proprio li' nelle due grandi capitali, dove il profumo delle quiches si sente spesso nei ristoranti vegetariani. 
Quello della quiche e' un profumo "invadente" e persistente, se vi piace non vi deluderà, si sentirà per tutto il giorno e se ne avanza un po' quando la riscalderete si farà risentire con la stessa energia, a me ovviamente ha fatto tanto piacere:))
La preparazione della quiche e' stato un grande evento, meditato a lungo, programmato in anticipo, preceduto da prove, insuccessi clamorosi e infine da una consultazione di gruppo sul forum di Coquinaria che ha partecipato virtualmente e contribuito alla realizzazione della mia pasta brise'!
Chissà quante persone avranno preparato questa ricetta senza affaticarsi tanto! 
Per me non e' andata proprio così; e' una ricetta che richiede un po' di tempo pero' la base e le verdure si possono cuocere con un giorno di anticipo quindi per la preparazione finale ci vogliono solo 5 minuti dopodiche' si mette in forno. Comunque, come avrete intuito, il risultato e' stato cosi' soddisfacente che la fatica si dimentica e poi la prossima volta so che sarà più semplice prepararla.
La ricetta e' di Yotam Ottolenghi, fantastico chef che si trova a Londra e che sara' di sicuro una tappa del mio prossimo viaggio nella terra britannica.


Song of the day: Wait


QuicheIMG_4674


Ricetta


Per la base:
270 gr farina
135 gr burro
1/2 cucchiaino di sale
1/4 cucchiano di zucchero
4 cucchiai di acqua fredda


Mettere la farina, il sale, lo zucchero e il burro freddo tagliato a cubetti nella planetaria, lavorare velocemente fino ad ottenere un impasto granuloso. Unire l'acqua e continuare a lavorare fino a formare un impasto omogeneo.
Avvolgere la pasta nella pellicola e lasciare in frigo per un minimo di un ora fino ad un massimo di due giorni.
Stendere la pasta sulla carta da forno, metterla in una teglia di 25/27 cm.
Mettere in congelatore per 10 minuti. Accendere il forno a 180°, coprire la pasta con un altro foglio di carta da forno e riempire lo stampo con dei pesi oppure legumi secchi o riso.
Cuocere 25 minuti, togliere i pesi e cuocere per altri 25 minuti. 


Ripieno
2 peperoni 
6 cucchiai di olio d'oliva
sale
1 melanzana tagliata a cubetti
1 patata dolce tagliata a cubetti
8 pomodorini 
1 cucchiaio di aceto balsamico 
2 cipolle
2 zucchine
1 cucchiaino di origano o due di timo fresco
80 gr di caprino fresco
2 uova
180ml di panna

Pulire e tagliare a strisce grandi i peperoni.  Metterli in una teglia rivestita di carta da forno e arrostirli  a 220° con la funzione grill per mezz'ora.
Metterli in una ciotola coperta con la pellicola per 15 min. Spellarli e tagliarli a striscioline.
Lasciare la temperatura del forno a 220° e togliere il grill.
Condire le verdure con l'olio d'oliva e il sale, aggiungere un cucchiaio di aceto balsamico ai pomodorini, tagliati in due.
Cuocere la melanzana e la patata dolce in una teglia per mezz'ora;  le zucchine, le cipolle e i pomodorini per 20 minuti.
Mettere le verdure ancora calde in un contenitore chiuso per circa mezz'ora, in questo modo finiranno di cuocersi e resteranno più morbide.
Disporre le verdure sul fondo della quiche, aggiungere l'origano, il caprino e in ultimo i pomodorini.
Mescolare le uova e la panna, condire con sale e pepe e versare sulle verdure.
Cuocere a 175° per 50 minuti, se necessario coprire a meta' cottura con un foglio di carta stagnola.
N.B. Come al solito ho modificato la ricetta, ho sostituito il finocchio con le zucchine, ho diminuito la quantità di formaggio e di olio. Nel link potete confrontare la ricetta originale.


For Liverpuddlians and English speaking people everywhere …


Restaurants are not the only memory I have left of my trips: I swear it! But the veggie quiche, to me is tied to Paris and London and it's not a coincidence, because when I am over there I go hunting for quiches; here you wouldn't find them easily so I decided to try and make one myself. It is called Vegetable Tart but I call it quiche, I don't think it's a problem because a quiche is usually savory.
In the filling there are eggplants, zucchini and red peppers which is a mix of  typical mediterranean flavour and yet the intense fragrance of the vegetables (that combined with the puff pastry is so particular) took me right there, in London and Paris where the rich aroma of quiches often permeates vegetarian restaurants.
The quiches' aroma is pervasive and persistent. If you like it it won't let you down for you will smell it all day. And if you have some quiche left over when you heat it up the fragrance will fill your home again with the same power which was a pleasure for me of course:))
Preparing the quiche was quite an ordeal: a lot of premeditation, arrangements in advance followed by trials and tremendous errors and by a group consultation involving the Forum of Coquinaria. All my friends virtually participated and gave their contribution to my first puff pastry!
I'm sure that a lot of people cooked this recipe without getting so stressed out!
It didn't go that way for me; it is a recipe that takes a bit of time but the vegetables and the base can be cooked a day in advance so the final preparation, when you assemble the ingredients, will take just a few minutes, before baking it.
Anyway, as you may have guessed, the results was so rewarding that my tireless efforts were soon forgotten. Also, now that I have practiced some important steps, I'm sure that making it will be easier in the future.
The recipe is by Yotam Ottolenghi, a fantastic chef in London who will be a sure stop in my next trip to the British land.


Song of the day: Wait


Ingredients
Pastry
2 cups all-purpose flour plus more
3/4 teaspoon kosher salt
1/2 teaspoon sugar
10 tablespoons (1 1/4 sticks) chilled unsalted butter, cut into 1/2" cubes


Filling
2 red bell peppers
11 tablespoons olive oil, divided
1 medium eggplant, cut into 1" cubes
Kosher salt, freshly ground pepper
1 small red-skinned sweet potato, peeled, cut into 1/2" cubes
2 medium vine-ripened tomatoes, each cut into 8 wedges
1 tablespoon balsamic vinegar
2 small onions, thinly sliced
1 small fennel bulb, thinly sliced
2 teaspoons fresh thyme leaves, divided
4 ounces fresh goat cheese, crumbled
2 large eggs
3/4 cup heavy cream
special equipment
A 10"-diameter glass or ceramic pie dish


Preparation
Pastry
Preheat oven to 350°. Pulse 2 cups flour, salt, and sugar in a food processor. Add butter; pulse until coarse meal with pea-size lumps forms. Drizzle 3 Tbsp. ice water over mixture. Pulse until moist clumps form, adding more ice water by 1/2-tablespoonfuls if dry. Gather dough into a ball; flatten into a disk. Wrap in plastic; chill until firm, at least 1 hour and up to 2 days.
Roll out dough on a lightly floured surface to a 13" round. Transfer to pie dish; press onto bottom and up sides of dish. Trim dough, leaving 1/2" overhang. Fold overhang under; crimp edges. Freeze for 10 minutes.
Line dough with foil or parchment paper; fill with dried beans or pie weights. Bake for 25 minutes. Remove foil and beans. Return to oven and bake until crust is light golden brown, 25–30 minutes longer. Let crust cool completely. DO AHEAD: Can be made 1 day ahead. Store airtight at room temperature.


Filling
Arrange racks in upper and lower thirds of oven; preheat to 450°. Using a small paring knife, cut around stems of bell peppers. Lift out stems with seeds and discard. Transfer whole peppers to a small baking dish; drizzle with 2 Tbsp. oil. Roast on upper rack, turning peppers occasionally, until tender, about 40 minutes. Transfer peppers to a small bowl; cover with plastic wrap. Let stand for 15 minutes. Peel peppers, then tear into strips. Set aside.
Meanwhile, toss eggplant with 4 Tbsp. oil in a small bowl to coat. Season with salt and pepper. Spread out in a single layer on a rimmed baking sheet and roast on lower rack for 10 minutes. Add sweet potato to eggplant and mix gently. Continue roasting until eggplant and sweet potato are tender, 20–25 minutes longer. Set vegetables aside.
Line another rimmed baking sheet with parchment paper. Toss tomatoes with vinegar, 1 Tbsp. oil, and a pinch of salt and pepper in a medium bowl. Arrange tomatoes, skin side down, on prepared sheet. Roast on lower rack until tomatoes are beginning to brown and are tender but not mushy, about 20 minutes. Set aside.
Meanwhile, heat remaining 4 Tbsp. oil in a large skillet over medium-high heat. Add onions and fennel; cook, stirring frequently, until parts of vegetables are slightly softened and others still crisp, 5–6 minutes. Season with salt and pepper. Using a slotted spoon, transfer to a paper towel-lined plate. DO AHEAD: Vegetables can be prepared 1 day ahead. Cover separately and chill.
Preheat oven to 350°. Scatter onion-fennel mixture over bottom of tart crust. Top with eggplant-sweet potato mixture and roasted peppers. Scatter 1 tsp. thyme over. Top with goat cheese and tomatoes.
Whisk eggs and cream in a small bowl; season lightly with salt and pepper. Slowly pour egg mixture over vegetables. Scatter remaining 1 tsp. thyme on top.
Bake tart until filling is set and pastry is golden brown, 50–60 minutes. Let stand for at least 10 minutes. Serve warm or at room temperature.


domenica 19 febbraio 2012

Mini pancakes di patate e carote

mini cakes patate e carote1IMG_4483


Si ricomincia...Tra un libro e l'altro ho preparato qualcosa in questi due mesi e ho messo da parte foto e ricette aspettando momenti più tranquilli. Giovedì mattina ho superato il mio esame quindi mi prendo una bella pausa per tornare alla cucina.
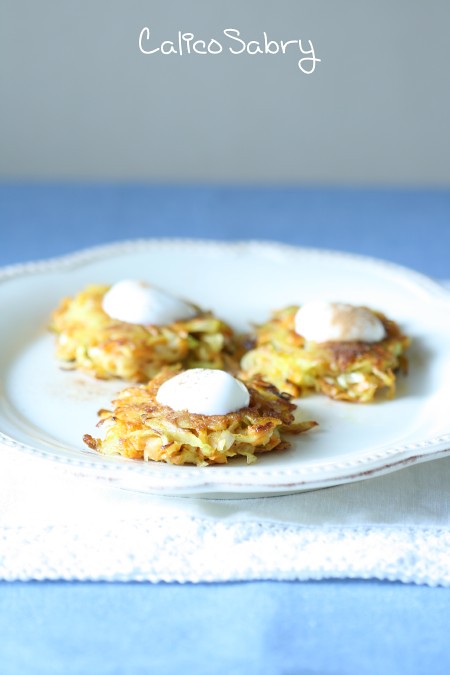
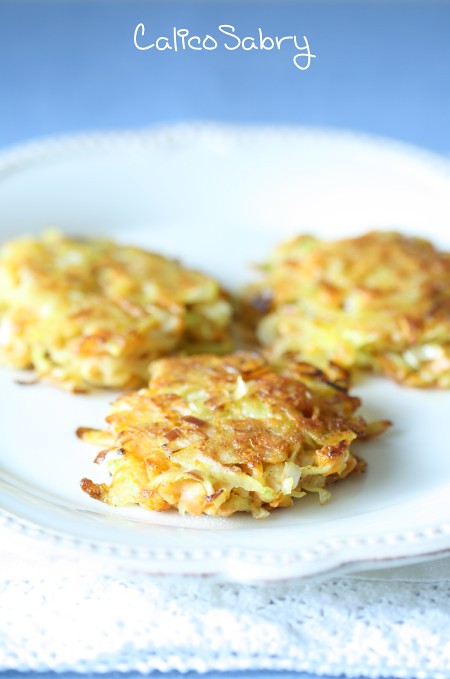
Ho scelto questi mini pankakes che archivierò tra gli antipasti...Non ho avuto problemi nel prepararli, al primo tentativo sono venuti subito bene, tutti... e questo è un requisito piuttosto raro nelle ricette, almeno in quelle che scelgo io. Quindi se cercate qualcosa che non vi faccia impazzire e che vi consenta di stare in cucina senza stress, questa è la ricetta giusta.
Si possono preparare in anticipo e poi scaldarli oppure si possono mangiare subito, in piedi, in attesa che qualcuno finisca di fotografarli ;))

Song of the day : Good Times Coming Feel The Sun....

mini cakes patate e carote2IMG_4477

Ricetta dal sito Wholefoods

Ingredienti per 12 pancakes

1 vasetto di yogurt
cannella o una spezia a piacere
2 porri
2 carote grandi grattuggiate (450 gr circa)
1 patata grattuggiata (350 gr circa)
1 uovo
2 cucchiai rasi di farina
sale
pepe
6 cucchiai di olio d'oliva

Ho modificato un pò la ricetta originale, che potete trovare sul sito se volete.
Ho tagliato i porri a fette sottilissime, eliminando la parte verde.
Dopo aver grattuggiato le patate le ho messe nello scolapasta e le ho strizzate, poi ho finito di asciugarle con la carta da cucina, devono essere ben asciutte.
Ho mescolato tutti gli ingredienti in una ciotola, ad eccezione dello yogurt e della cannella.
Ho formato i mini pancakes e li ho cotti in un tegame grande, in due volte, dividendo i 6 cucchiai d'olio.
Lasciare uno spazio di circa 3 cm tra un pancake e l'altro, cuocerli per 8/10 minuti girandoli una volta. Servirli con lo yogurt o anche senza, sono buoni lo stesso!

mini cakes patate e carote3IMG_4469_2


For Liverpuddlians and English speaking people everywhere …


Here we go again...Despite all of my studying, I managed to cook some things. I prepared a few dishes "between" history books and I put some pictures and recipes on the back-burner waiting for quieter times. Thursday morning I passed my exam so I think I deserve a nice long break and to get back to my cooking for a while. I chose these mini-pancakes which I will put on my blog archive among starters. I didn't have any problem making them, they came out well on the first attempt....and this is a rare occurrence in recipes, or at lest in the ones I choose.
So if you are looking for something that won't drive you crazy  and allow you to have a stress free time in the kitchen, this is just the recipe for you.
You can make them in advance and heat them afterwards or you can eat them immediately, while standing, until the last picture has been taken!


Song of the day : Good Times Coming Feel The Sun....


Recipe taken from Whole Foods Market site
Makes 2 dozen
Make these easy bites ahead, if you like. Once cooled, layer them between sheets of parchment paper in an airtight container then re-crisp on a lightly oiled baking sheet in a 400°F oven just before serving. There are three choices for flavoring the sour cream—spicy, savory or sweet and sour. Choose your favorite or reduce the amounts to make all three and offer a variety.


Ingredients
1/2 cup light sour cream 
1 small chipotle pepper in adobo sauce, minced OR 2 teaspoons Dijon mustard OR 2 tablespoons cranberry 
sauce 
2 green onions, thinly sliced 
1/2 small yellow onion, grated 
2 large carrots (about 1/2 pound), peeled and grated 
1 large russet potato (about 3/4 pound), peeled, grated and squeezed to remove excess water 
1 egg, lightly beaten 
2 tablespoons all-purpose flour 
3/4 teaspoon salt 
1/4 teaspoon ground black pepper 
6 tablespoons extra-virgin olive oil, divided


Method
In a small bowl combine sour cream with your flavoring choice: chipotle pepper, mustard or cranberry sauce. Set aside. In a large bowl, fold together onions, carrots, potatoes, egg, flour, salt and pepper until well combined. Heat 3 tablespoons oil in a large skillet over medium heat. Working in batches, form each pancake by dropping about 2 tablespoons of the potato mixture into the skillet. Space pancakes about an inch apart, flatten and cook, flipping once, until deep golden brown and cooked through, 8 to 10 minutes total. (Add remaining 3 tablespoons oil to skillet halfway through.) Transfer to a paper-towel lined baking sheet to drain briefly. Serve with a teaspoon of flavored sour cream on each.